Subdivision Manual
Introduction
Welcome to Subdivision. Subdivision is the safest, easiest and fastest way to modify the history of your svn repository. Subdivision tackles three major problems that svn administrators have faced for years, but have had no reliable tools to help solve them until now. These problems are:
- Permanently deleting (also known as obliterating) files from an svn repository.
- Extracting files into a new repository.
- Splitting an svn repository into two parts while guaranteeing that all input files have been included in at least one of the output repositories.
Experienced svn administrators may have used svndumpfilter in the past, to delete or extract files from their repositories. For extremely simple cases, such as deleting a couple of files that have been added accidentally, svndumpfilter can work perfectly well. But as soon as we start using it on a repository with file renames, file copies etc., svndumpfilter can quickly become a huge drain on time as the svn administrator is forced into repeatedly filtering and loading the repository in order to resolve the new errors that come up in each attempt.
Subdivision understands your repository’s structure, and uses sophisticated algorithms that select additional files based on the user’s selections. This eliminates all potential errors and the operation completes in one pass. Add to that the fact that Subdivision will only process the required revisions, and the time savings are so substantial that the vast majority of our customers have paid off their investment in Subdivision in the first week of use.
Subdivision is extremely safe as it never modifies your input repository, always creating a new repository as the output. In addition, Subdivision has a WYSIWYG (What You See Is What You Get) interface. This means that the files marked as present on the Subdivision interface will be exactly the files you will get in the output repository.
But don’t take our word for it. If you have not bought Subdivision already, you may try Subdivision for yourself by downloading our demo from the website. You may use the demo to evaluate all features of Subdivision including the creation of output repositories.
This manual provides an in-depth analysis on how to use Subdivision.
Setting up Subdivision
Downloading Subdivision
If you have purchased Subdivision
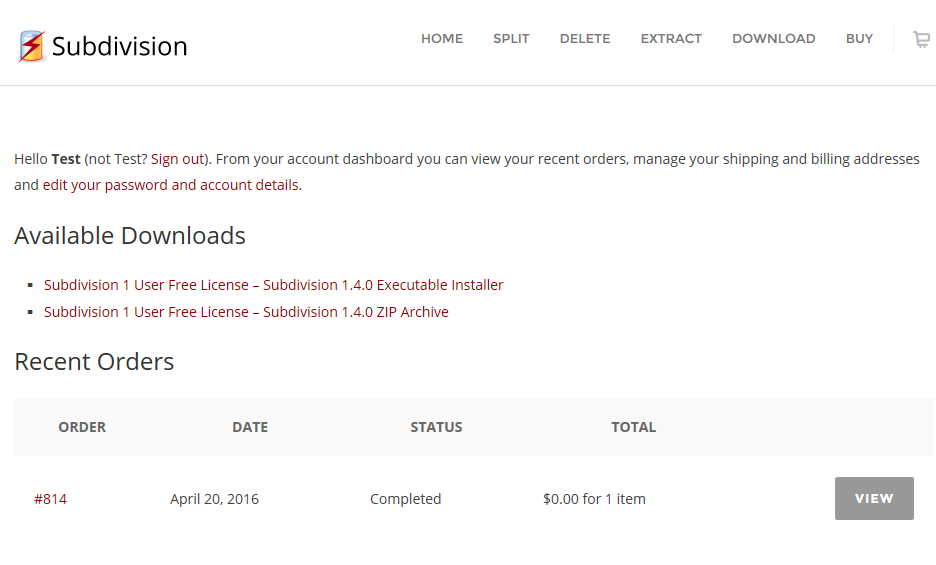
If you have already purchased Subdivision, you can download the latest version by logging in to http://subdi.vision/account/ using the email and password you used when placing the order. The latest Subdivision version can then be downloaded from the links under the Available Downloads section.
If you have just placed the order, you may also download Subdivision by clicking on the download links that were emailed to you.
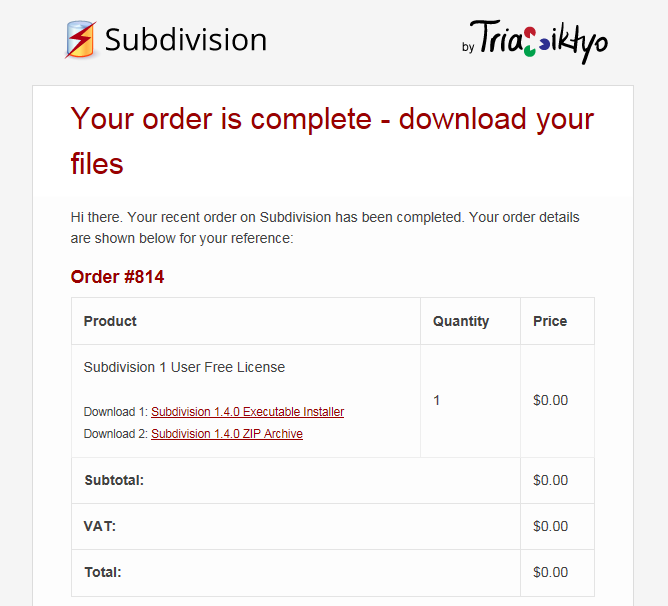
Please note that these links may become invalid when a new version of Subdivision is released, in which case you can download Subdivision by logging into your account using the email and password you used when placing the order..
If you are evaluating Subdivision
You can download the Subdivision Demo from the following URL
http://subdi.vision/download/
The Subdivision Demo is a fully functioning version of Subdivision with one important limitation. You may use the Demo to try out all the functionality of Subdivision. The generated output repositories (or dump files), will have the correct file structure and history according to your project settings and file selections. You can check the file structure and history of the output using your favorite svn tool (such as TortoiseSVN etc.). However, in the Demo version, the contents of all files in the output repository (or dump file) will be emptied out and replaced with some automatically generated placeholder text. Once you are happy with the correctness of the output file structure and history, you may purchase a Subdivision license and process your project again using the paid version which of course includes the file contents in the output repository.
Installing Subdivision
Subdivision is provided as an executable installer. Before you install Subdivision, it’s a good idea to uninstall any old versions of Subdivision that you may have installed. If you are installing the paid version after evaluating the Demo version, it’s also advisable to uninstall the Demo version. The uninstaller can be found in the program group Subdivision (or Subdivision Demo) and also in the Windows Control panel in the ‘Uninstall a program’ section.
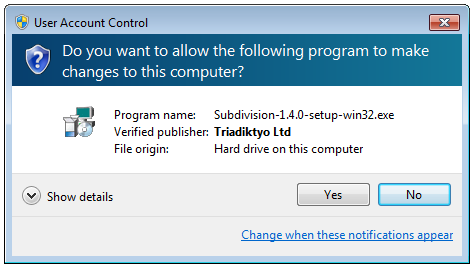
Start the installer by running Subdivision-1.x.0-setup-win32.exe (or SubdivisionDemo-1.x.0-setup-win32.exe if you are installing the demo). Please make sure the Verified publisher is Triadiktyo Ltd, the company developing Subdivision, and click Yes.
Welcome to the Subdivision Installer. Please click the Next button.
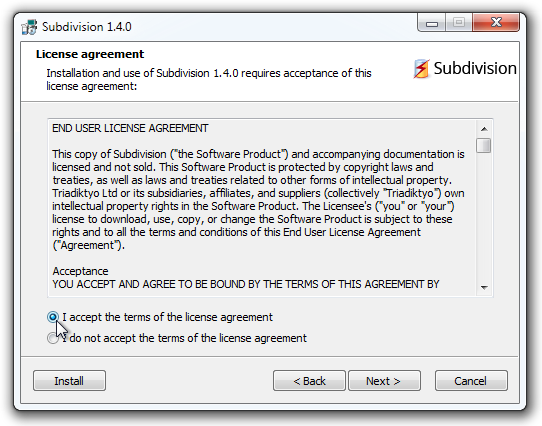
You are required to accept the terms of the license agreement and click the Next button.
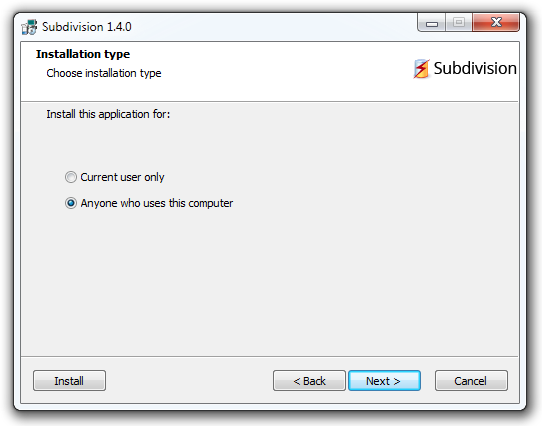
Select whether you would like to install Subdivision for all users on the machine or just for the current user.
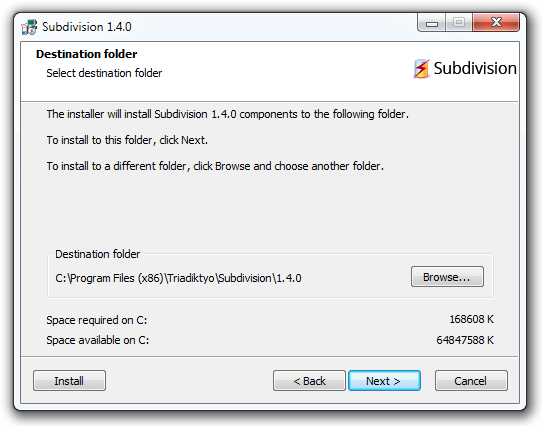
Choose the installation location and click the Next button.
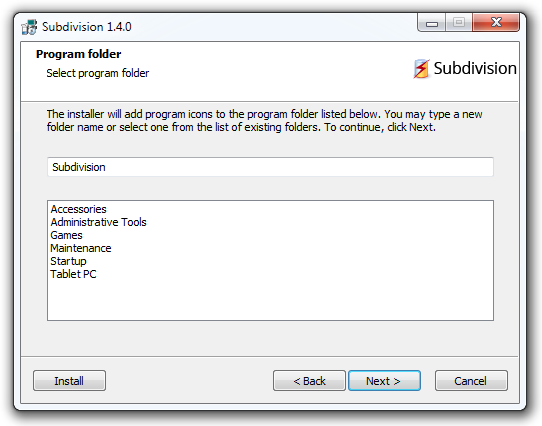
Choose the program group to install Subdivision in. By default, a new group called Subdivision will be generated.
The installer can optionally create a shortcut in Desktop.
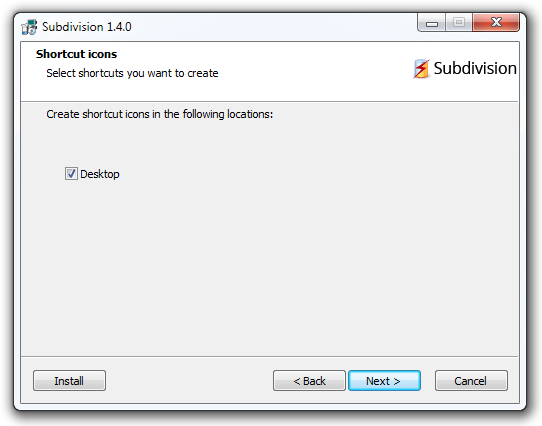
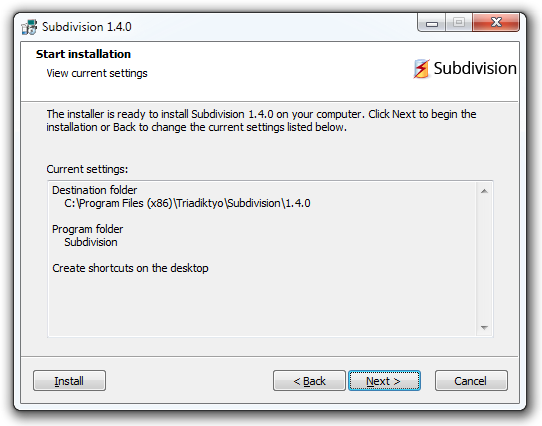
The overview of the installation procedure. Click Next to begin installing.
Installing Subdivision… This will take a few seconds.
At this stage you will have successfully installed Subdivision. Click Finish to start Subdivision.
Licensing
Online Activation
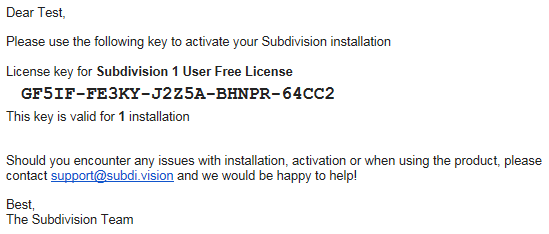
Subdivision requires on-line activation (the demo version does not require activation). To activate Subdivision you will need the license key you received in an email when you placed your order.
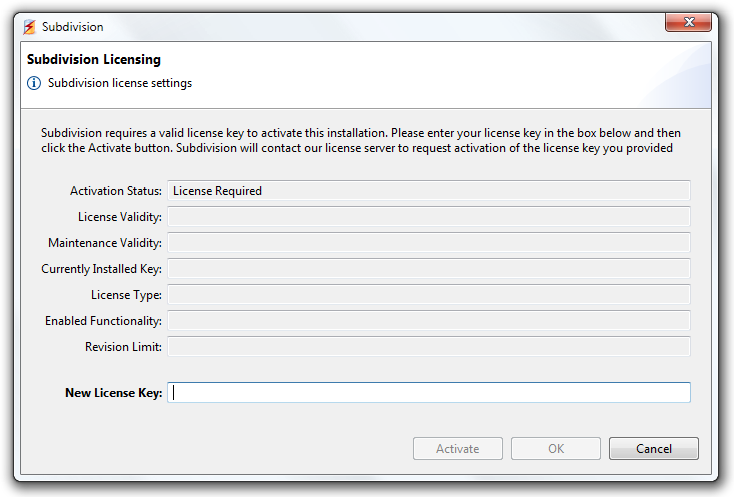
When you launch Subdivision for the first time you will see the following activation dialog:
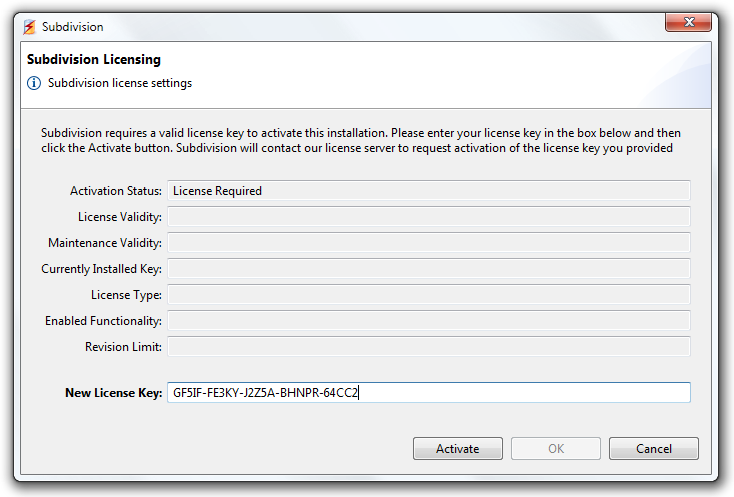
Enter the license key and click the Activate button.
Subdivision will contact the online license server to activate your installation. When the activation succeeds you will see the following dialog box:

Congratulations, your copy of Subdivision is ready to use.
Manual Activation
If the machine you are installing Subdivision on has no internet access, you will have to activate Subdivision manually. If the connection to the licensing server fails, the following dialog box will come up:
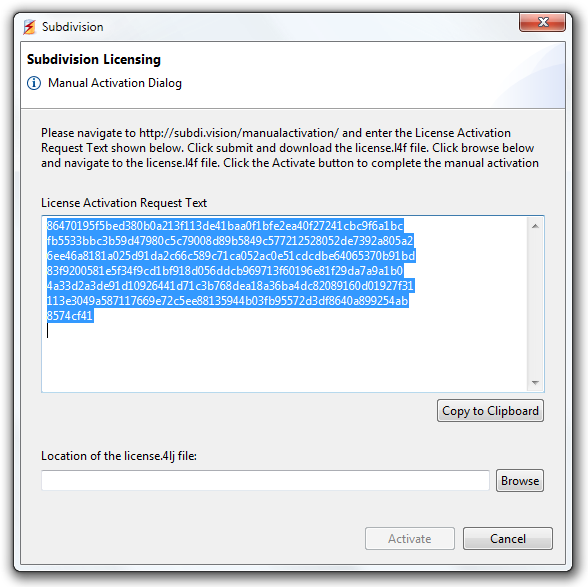
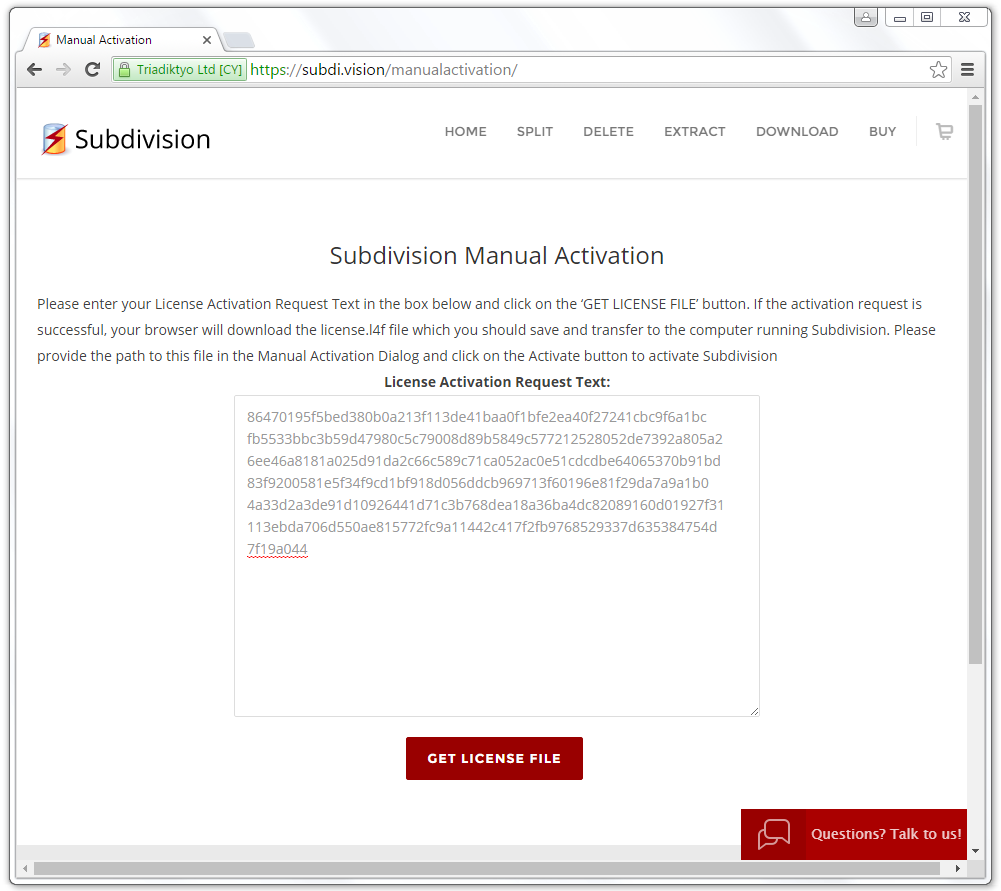
On a machine with internet access, open a browser and navigate to http://subdi.vision/manualactivation. The code shown in the above dialog has to be transferred to the manual activation page on the website as shown here:
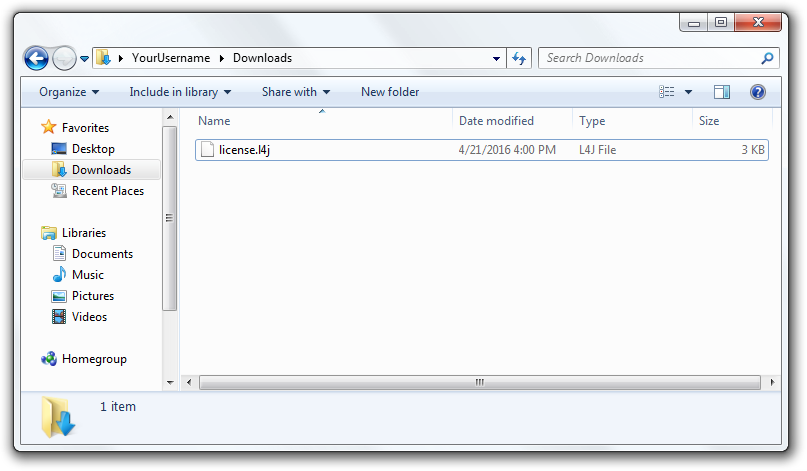
Click the GET LICENSE FILE button to download the license file called license.l4j. You will then have to transfer this file to the machine you installed Subdivision on. On the manual activation dialog, click the Browse button, find the location of the license.l4j file on your disk and click Open.
If the manual activation is successful you will see the following confirmation dialog box:

Congratulations, your copy of Subdivision is ready to use.
View / Change License information
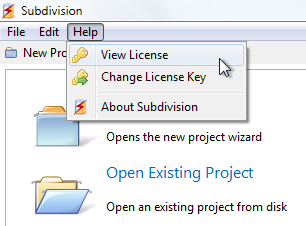
You may view the license information from menu Help → View License.
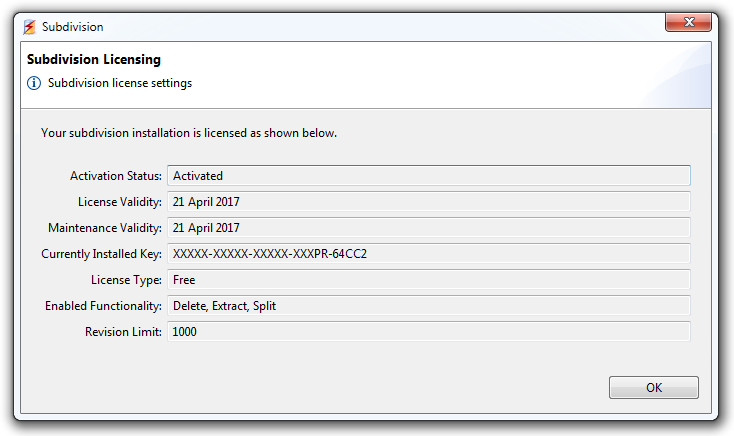
This will show the dialog below with information about your license.
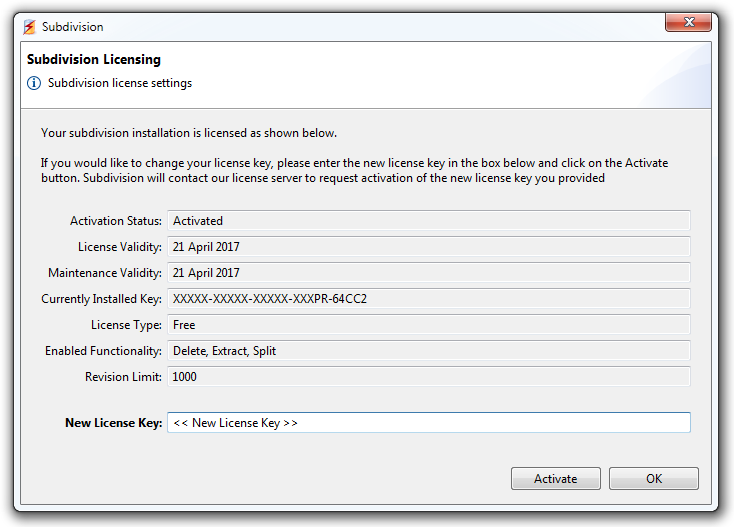
If you would like to change your license key, please use menu Help → Change License Key. You may have to change the license key if you upgrade your Subdivision license to handle more revisions, or when you extend your support contract.
To change the key, please enter your New License Key in the dialog below and click the Activate button.
Checking for updates and updating Subdivision
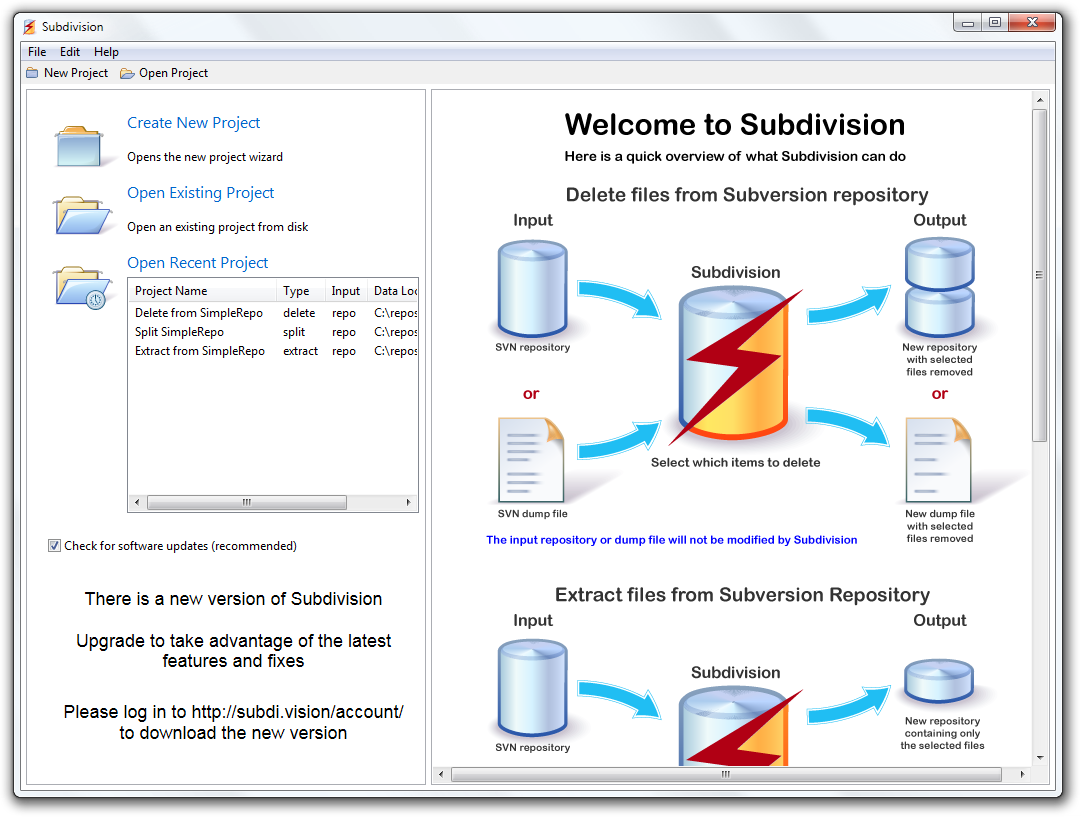
Subdivision can check if you are running the latest version. This information is shown in the welcome page. We advise that you always upgrade to the latest version of Subdivision as it is continually improved with new features and fixes.
When an upgrade is available, you will see a message as shown in the bottom right of the image below:
To disable the update check, untick the checkbox ‘Check for software updates (recommended)’
To update subdivision you need to download the new version. If you have purchased Subdivision, please visit http://subdi.vision/account/ to download the latest version. If you are still evaluating Subdivision please visit http://subdi.vision/download/ to get the latest demo version.
Once you download Subdivision, it’s best to uninstall the older version before installing the new version. The uninstaller will not remove your projects or any other Subdivision settings. To uninstall Subdivision, run the Uninstaller from the Subdivision program group or from the Windows ‘Uninstall a program’ section of the Control Panel.
Using Subdivision
The Welcome Page
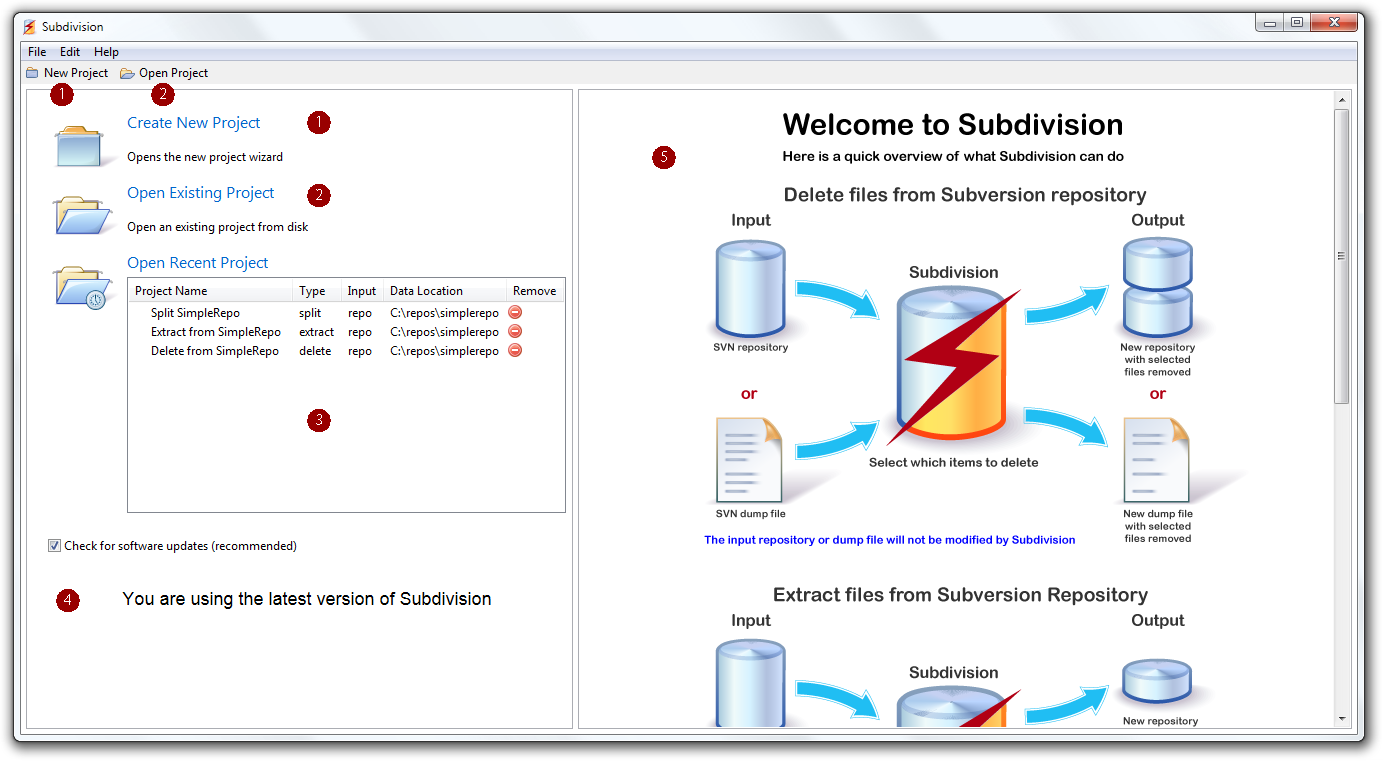
When you start Subdivision you will see the following welcome page:
You can find more details on the numbered items from the following sections
- Creating a new project
- Opening an existing project
- Opening a recently opened project
- Checking for updates and updating to the latest version
- A very quick overview of what Subdivision can do
The Processing Page
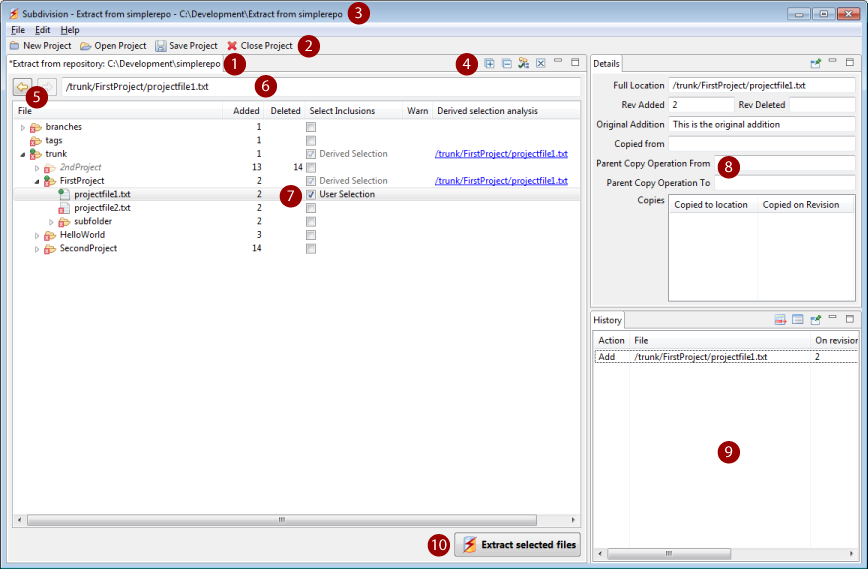
When a project is created and opened (see the relevant sections for how), Subdivision will display the file selection page. Here’s an annotated image of the file selection page followed by some explanations for each number. Don’t worry if some of the explanations don’t make a lot of sense at this stage. By the time you reach the end of this manual, everything will be crystal clear.
- This section displays the project type (Delete, Extract, Split) as well as the input type (repository, dump file or URL) followed by the location of the input repository, dump file or URL.
- The toolbar allows the user to create a new project, open an existing project, save changes to the current project and close the currently open project.
- The window title displays the name of the project as followed by its location on disk.
- This set of buttons lets the user do the following:
![]() Search for files and add them to your selection This button open the search dialog where you can search for files and add them to your selections. See the search section for details
Search for files and add them to your selection This button open the search dialog where you can search for files and add them to your selections. See the search section for details
![]() Expand the tree below to display the files. The following dialog will come up that lets the user choose how many levels to expand the tree to.
Expand the tree below to display the files. The following dialog will come up that lets the user choose how many levels to expand the tree to.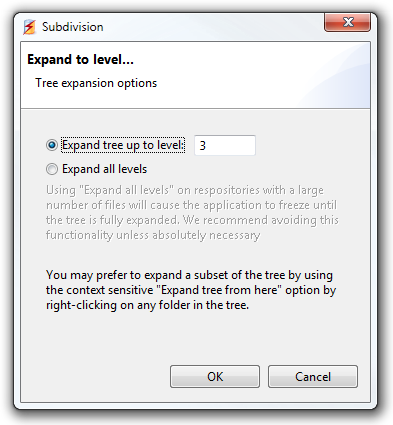
The default is to expand the tree up to 3 levels deep. The user can modify the required level or choose to expand all levels. Please exercise caution when using ‘Expand all levels’ as this may cause Subdivision to freeze when working on repositories with millions of files.
![]() Collapse all open folders in the tree below
Collapse all open folders in the tree below
![]() Reveal all user selections. Once the user starts making selections in the tree, this button can be used to reveal all of these selections in the tree
Reveal all user selections. Once the user starts making selections in the tree, this button can be used to reveal all of these selections in the tree
![]() Remove all selections. Clicking this button will remove all of the selections made in the tree by the user
Remove all selections. Clicking this button will remove all of the selections made in the tree by the user
![]() Select into repo 1. Select all items for inclusion into repository 1 (Split mode only)
Select into repo 1. Select all items for inclusion into repository 1 (Split mode only)
![]() Select into repo 2. Select all items for inclusion into repository 2 (Split mode only)
Select into repo 2. Select all items for inclusion into repository 2 (Split mode only)
- Selection history traversal buttons. Clicking on the left arrow will select the previously selected file. Clicking on the right arrow will select the next file in the selection history. This is of course, only enabled when we move back in the selection history using the left button.
- The full path to the currently selected file in the tree is shown here.
- The repository tree. This is where the user will make the file selections.
- The details view. See the details view section for details.
- The history view. See the history view section for details.
- The processing button. Once the file selection is complete, click on this button to start the processing stage that will create the output repository. See the processing section for more details.
Simplerepo, the simple example repository
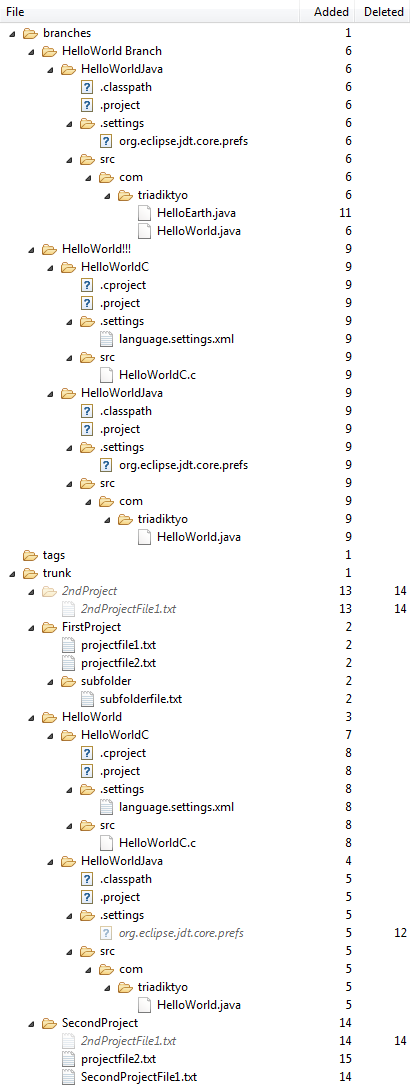
To help us explain the functionality in Subdivision, we will present examples based on a small repository that we have created. We invite you to download this repository from here: http://subdi.vision/downloads/repos/simplerepo.zip so that you can follow along the examples in this manual and try them out for yourself. Please unzip simplerepo.zip into folder C:\repos\ if you would like to follow the examples exactly as shown in this manual. At the end of the unzip operation you should have a folder C:\repos\simplerepo which contains the repository files you would have on an svn server as well as file C:\repos\simplerepo.dump which is the dump file of the simplerepo repository.
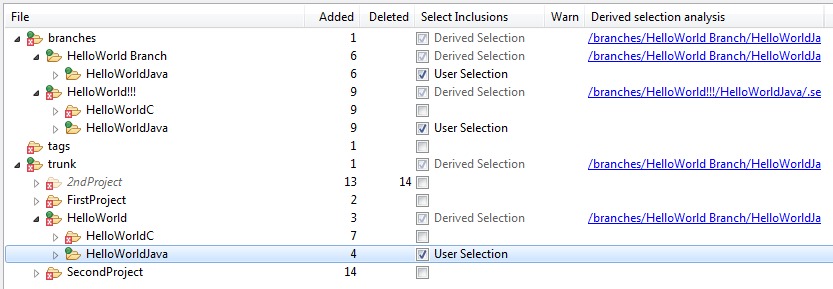
The repository has 15 revisions and contains the following file structure, as shown below. You can see this file structure when a project – having this repository or dump file as the input location – is loaded in Subdivision. It is worth noting the files shown as grayed out such as /trunk/2ndProject. These are files that have been deleted in a past revision and would not be visible when viewing the HEAD revision using another client such as TortoiseSVN. They are however part of the repository’s history and Subdivision allows you to select them for deletion or extraction.
Creating a new project
In order to carry out any operation on an svn repository with Subdivision you will have to create a project. A project holds information such as the project name, the operation type (Delete, Extract or Split), the input and output locations as well as the input and output types (repository or dump file).
Click on the ‘Create New Project’ label or icon, or navigate to menu File → New Project to open the new project wizard.
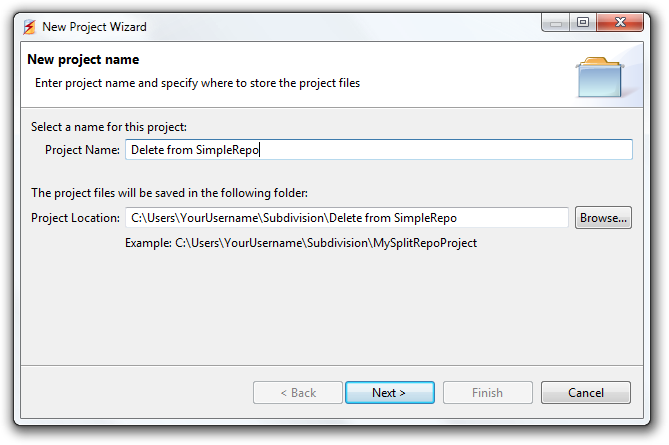
Naming the project
Let’s start by providing a name for our project. We will call this project ‘Delete from SimpleRepo’.
Choosing project type
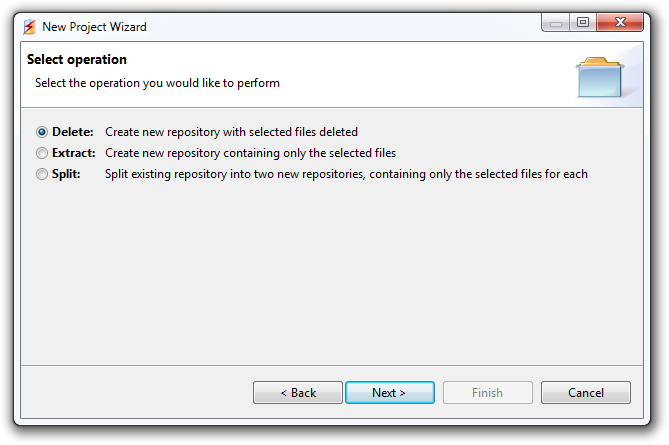
We now have to choose the project type. This can be one of the following:
- Delete: Select this if you would like to delete some files from a repository.
- Extract: Select this if you would like to extract some files into a new repository.
- Split: Select this if you would like to split the repository in two parts.
For this example we will create a project of type delete.
Input type and location
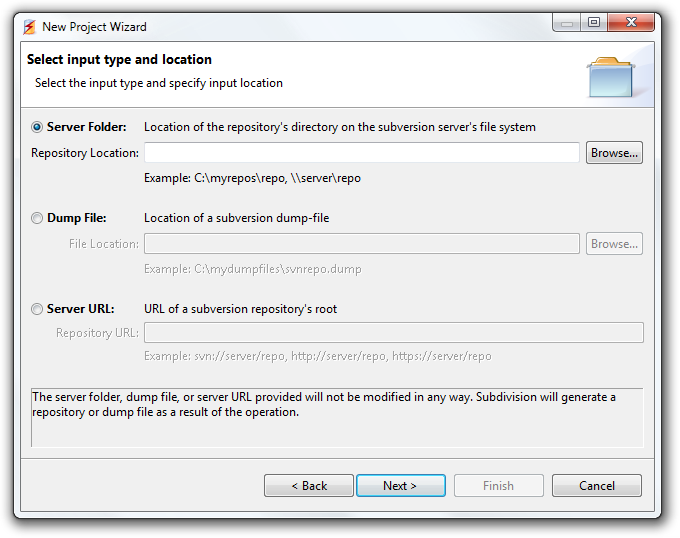
We now have to select the input type and input location.
Using a repository as input
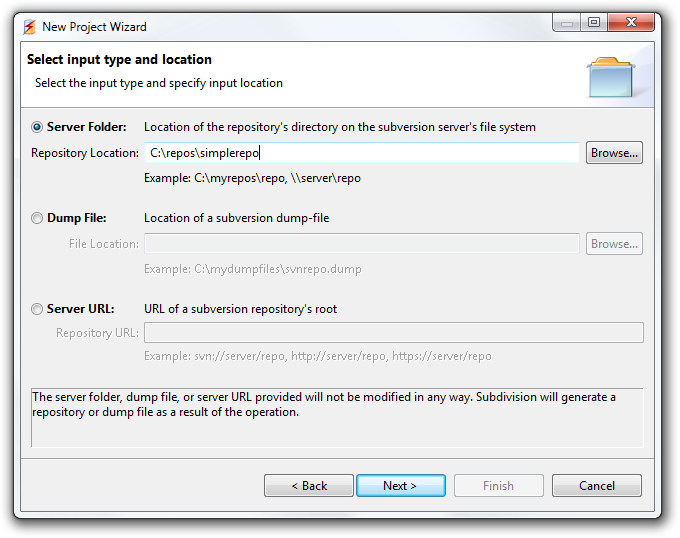
If you would like to use an svn repository as the input, we need to provide Subdivision with the location of the repository on disk.
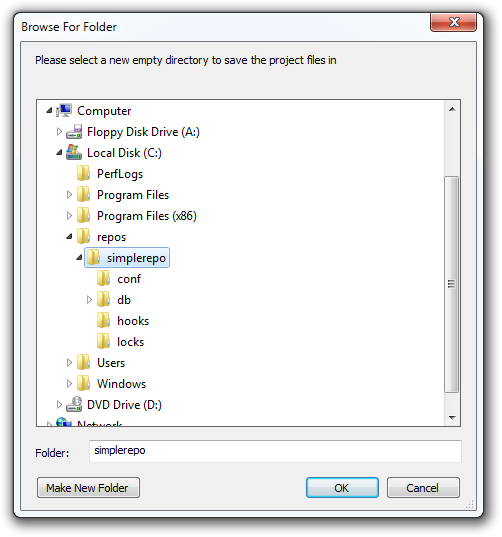
In this example, we have a repository in C:\repos\simplerepo. Using the Browse… button in the above dialog, select the root of the repository as shown below:
Using a dump file as input
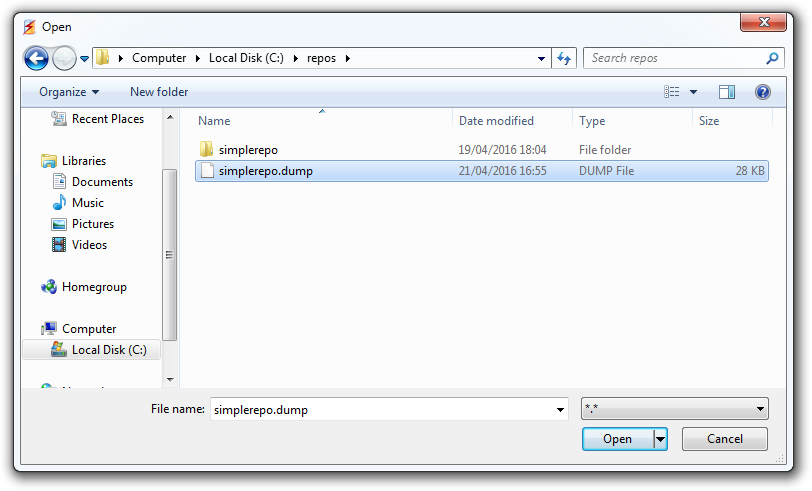
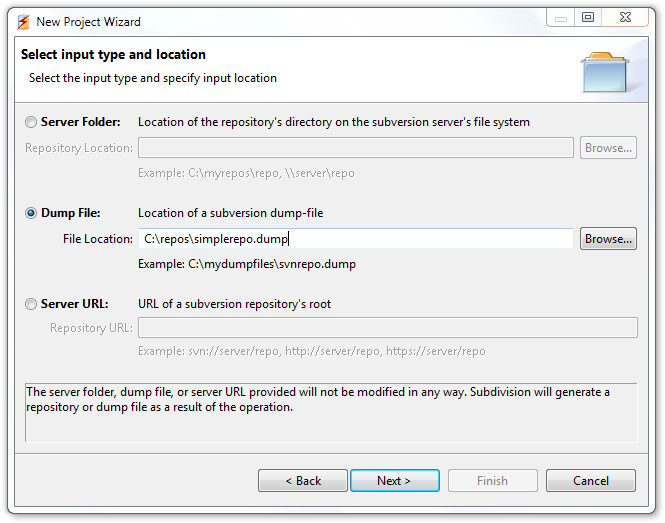
If you would like to use a dump file as input, select the Dump File: radio button and click the Browse… button to select a dump file.
As of Subdivision 1.5, you may also process dump files created using the –deltas dump option. To check the version of your dump file, inspect the first line in the dump file using a file editor. A dump file format version of 1 or 2 denotes the non-delta format dump file, whereas a file format version of 3 denotes a delta format dump file.
Using a Server URL as input
As of Subdivision 1.5, you may also process a repository via its Server URL. This is particularly useful in the cases where the repository does not physically reside on the machine you are running Subdivision on. It is also extremely useful when the server is running on an operating system other than windows or when you would like to process a VisualSVN VDFS repository.
To process a repository via its URL simply select the Server URL: section and insert the URL in the Repository URL: box. Supported URLs are ones starting with svn://, http:// and https://
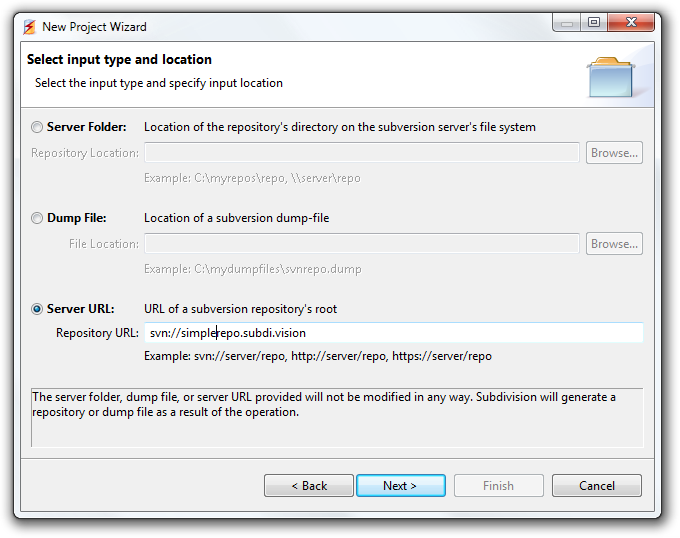
You may use http://simplerepo.subdi.vision to connect to the simplerepo sample repository that we provide. (Online test repo coming soon)
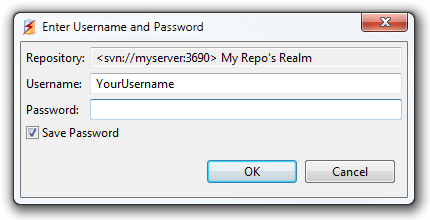
If the repository requires authentication, the subversion library within Subdivision will use any stored credentials found in the default location on your system (Usually in files under %APPDATA%\Subversion\auth\svn.simple). If no valid authentication credentials are found, Subdivision will prompt you for a username and password.
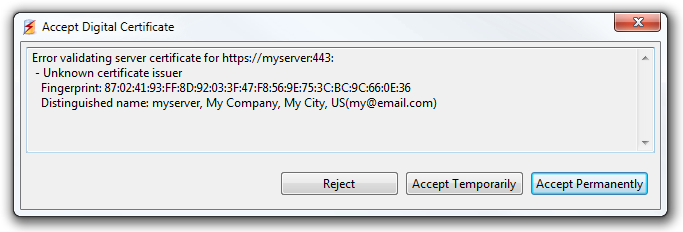
When connecting using https://, the certificate will also be checked. If the certificate is untrusted, you may get the following dialog asking you to accept the use of the untrusted certificate. If you accept the certificate permanently, a trust file will be created by subversion and stored in the default location for your system.
Once any required authentication is complete and connection to the repository is established, you will be presented with the following dialog.
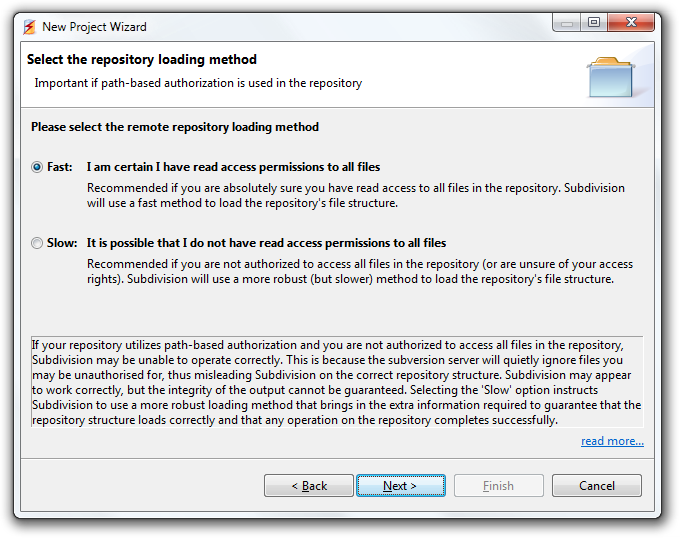
Subdivision is asking you to select which remote repository loading method to use.
The Fast method is recommended when you are absolutely sure that you have read access permissions to ALL files in the repository.
The Slow method is recommended if you do not have read access permissions to all files in the repository, or if you are unsure of your access rights.
Let’s analyze this in more depth.
When loading a repository, Subdivision builds a model of the subversion repository in memory. This in-memory model is then used by all the selection algorithms to calculate the derived selections and then subsequently to select which files will make it into the output repository during processing. It is therefore very important that this model is built using all files in a repository. If the server you are connecting to uses path-based authorization, and you are connecting using an account that is not provisioned for all files, the server will quietly skip the files you are not authorized to access. Unfortunately Subdivision has no way of knowing if any files were skipped during loading, as the subversion server goes out of its way to hide this information from clients such as Subdivision. Missing files can cause serious issues such as failure to load the repository, failure to process the repository or even worse we may get what appears to be successful processing but the output may not be correct and it may contain more or fewer files than what the user expected.
Our recommendation is therefore to only use the Server URL loading method against a repository that you own and that you can guarantee you have read access to all files in the repository.
If you don’t have access to all files in a repository, Subdivision can still correctly process a repository if you select the Slow option. When the Slow option is selected, Subdivision will use a different, but much slower method to load the repository structure. You would be right to question at this point whether the Subdivision team discovered a way to bypass the subversion authentication mechanism. The answer of course is no. This alternative loading method relies on a different loading method provided by subversion that will once again silently remove the files you are not provisioned for, but still provides a consistent structure that can be correctly used by Subdivision. Also bear in mind that as files are removed by the subversion server, some of the copy-from history may be removed, which may make it harder to identify the clones of a folder.
This option applies only to the Server URL loading method. This is because Subdivision has full access to repositories loaded via Server Folder or via Dump File.
For more details or clarification on the above please contact Subdivision support and we’d be happy to help.
Output type and location
On this page you can choose the output type and location. These settings can also be changed after the project is created and is open in Subdivision.
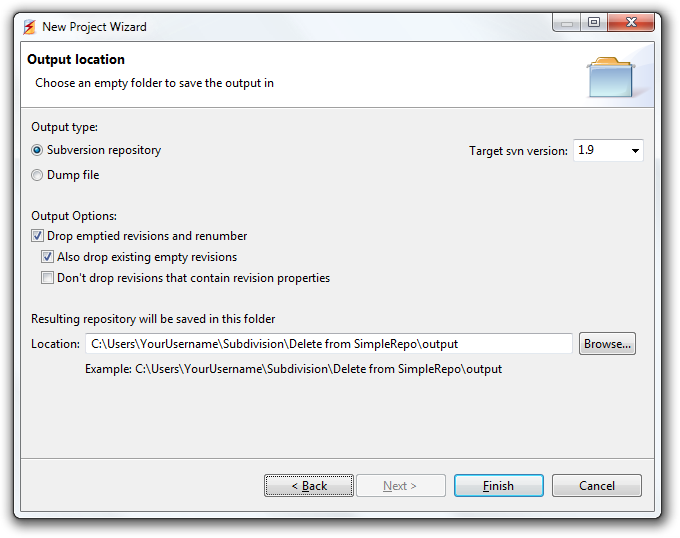
Output Type
You can have Subdivision output a repository or a dump file. When outputting a repository, you can choose to create a repository that targets an older svn version. The default is to target svn version 1.9 and we recommend that you use this option unless you have a serious reason not to upgrade your svn server to the latest version. If you really have to create a repository targeting an older version of svn you may choose between the 1.8 and the 1.6 – 1.7 versions. If you do not see the 1.8 and 1.6 – 1.7 options in the drop down list, it means that Subdivision was unable to find svnadmin with version 1.8+ in the PATH. Please add the bin folder of a recent svn installation to the windows PATH variable and restart Subdivision.
The dump file does not need to target a specific version of svn as the dump file format has not changed since svn version 1.6
Output Options
When Subdivision processes a repository, it replays the whole history of the repository and removes files that should not be in the output repository according to the user’s selections. For example in the delete mode, Subdivision will delete the files selected by the user from the history. In the extract mode, Subdivision will delete all files not selected by the user. This means that depending on the user selections, some revisions may end up having no files in them. This will become an empty revision.
Drop emptied revisions and renumber option
The ‘Drop emptied revisions and renumber’ checkbox allows the user to choose how these empty revisions are handled. When the ‘Drop emptied revisions and renumber’ is selected, the revisions that have been emptied out will not be written to the output repository. All subsequent revision numbers will then be renumbered down so that no revision gaps appear in the output repository’s history.
Additionally, by selecting this option, Subdivision will heavily optimize the processing step by calculating the list of required revisions that need to be read in from the input repository. By only reading in the required revisions, Subdivision is able to dramatically speed up the processing, especially when extracting a few files from a very large repository or dump file.
If the ‘Drop emptied revisions and renumber’ checkbox is deselected, Subdivision will not drop the emptied revisions from the output. The svn:log (i.e. the commit message) of emptied out revisions will be changed to “This is an empty revision for padding.”. The processing time on large repositories may increase dramatically as we now have to read in and process all the revisions in the repository. This is because Subdivision needs to have the date and time that each revision was committed at, in order to set it as the commit date and time of the empty padding revision that will be written.
It’s also worth noting that emptied out revisions, whether they are dropped or not, will have all of their revision properties dropped too. This functionality is consistent with the functionality present in svndumpfilter. A future Subdivision version will provide an option to preserve the revision properties of emptied out revision (when the empty revisions are not dropped).
Also drop existing empty revisions
The ‘Also drop existing empty revisions’ checkbox controls whether already empty revisions in the input are dropped from the output. Empty revisions are often padding revisions from when the input repository was filtered in the past using svndumpfilter or Subdivision. In this case it’s safe to drop these revisions from the output repository if we don’t need them. Sometimes empty revisions are used to commit revision properties. If you have empty revisions with revision properties and you would like to keep these in the output repository then you will have to un-check this option.
Don’t drop revisions that contain revision properties
Every revision has 3 revision properties at a minimum (there are rare exceptions to the previous statement but they are unimportant for the purposes of this discussion). These revisions properties are the svn:author which records the username that committed the revision, the svn:date which records the date and time the commit took place and the svn:log which records the commit message given during the commit.
As discussed above, when the ‘Drop emptied revisions and renumber’ checkbox is selected, empty revisions are dropped from the output and the rest of the revisions are renumbered down. Also if we selected ‘Also drop existing empty revisions’, then any revisions that are already empty will also be dropped.
These dropped revisions could however contain useful revision properties that we may want to preserve in the output repository. This is what the ‘Don’t drop revision that contain revision properties’ checkbox controls. When selected, any revision that contains revision properties (other than the standard 3 revision properties discussed earlier) will not be dropped.
Resulting repository will be saved in this folder
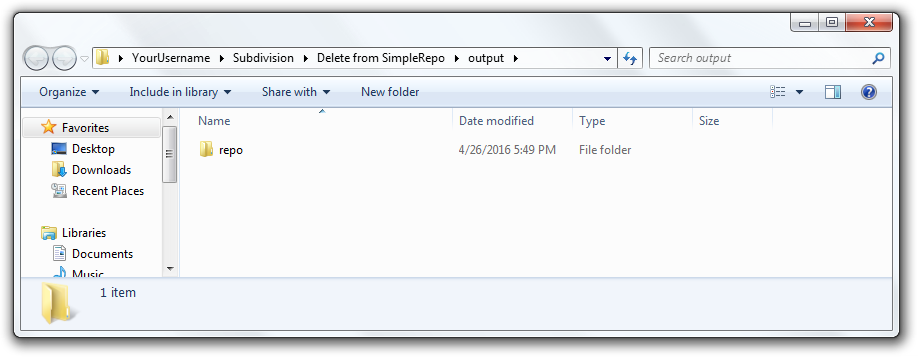
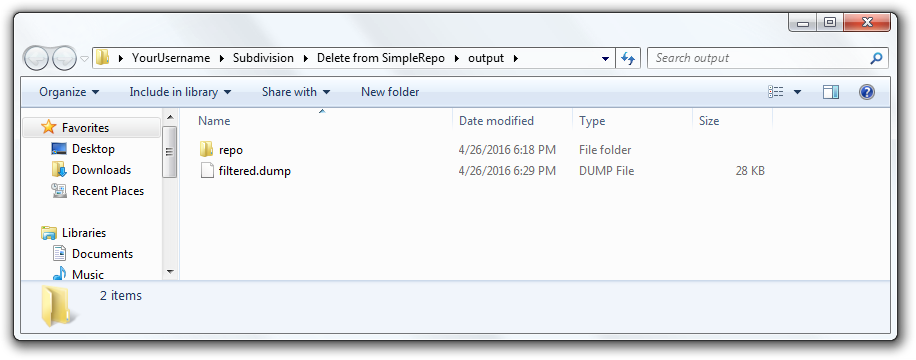
This is the location where the output repository or dump file will be written to. By default this is set to a folder called ‘output’ that resides in the project folder. You may of course change the output location to anywhere you like. If the output type is a Subversion repository then a repository called ‘repo’ will be created in the output folder. You may of course rename that to another name of your choice, when you install it on your server. If the output type is a Dump file then a dump file called ‘filtered.dump’ will be created in the output folder.
Finishing up
Click finish to create the project. Subdivision will create the project and start loading it immediately. See the Loading a project section for details on the loading process.
Opening an existing project
To open an existing project, click on the ‘Open Existing Project’ label or icon, or navigate to menu File → Open Project… to open the new project wizard.
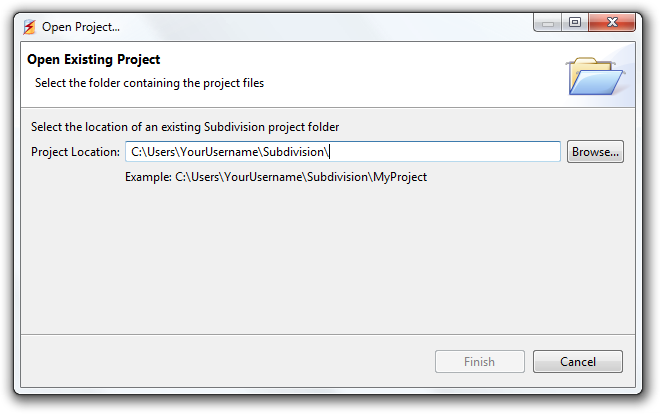
Subdivision projects are folders that contain a file called project.sdv. Unless you changed the default output location of a project, the output folder will be generated in the project folder.
To open a Subdivision project you have to provide Subdivision with the path to the project folder (not the project.sdv file). You can either paste the path in the above dialog or use the Browse… button to find the folder.
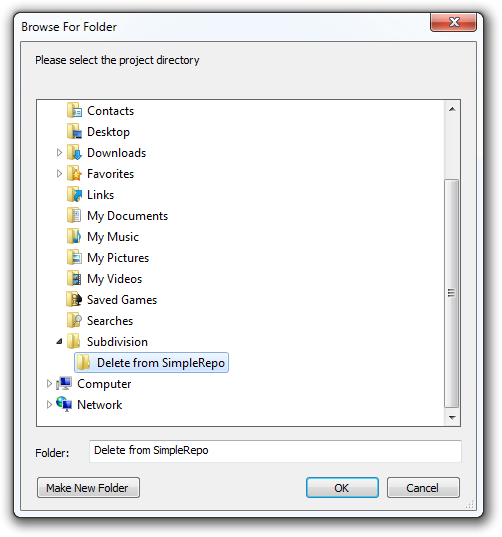
Click Finish to load the project. See the Loading a project section for details on the loading process.
Opening a recently opened project
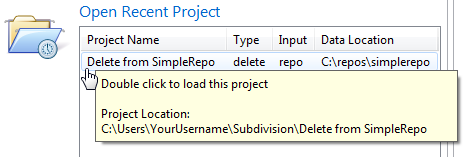
Recently opened projects will be displayed in the Welcome page. To load a recent project, you can either double-click on the recent project entry or select it and hit the Enter key.
The top entry in the Recent Projects table is the most recently opened project. The table shows the Project Name, the Type of the project (Delete, Extract or Split), the Input type (‘repo’ for repository, ‘dump’ for dump file) and the input data location.
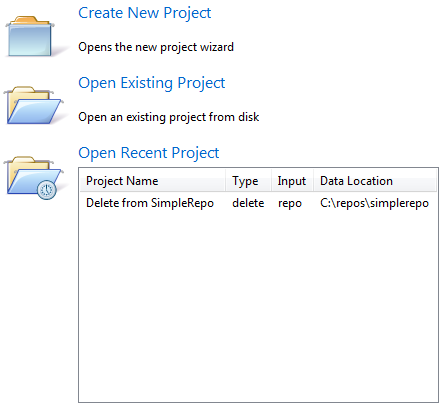
To see the project location on disk you can hover your cursor over the recent project entry.
Loading a project
In order for Subdivision to work, it needs to build a detailed, in-memory model, of your repository’s history. To build this in-memory model, Subdivision needs to process every revision in the repository (or dump file) in order to analyze when each file and folder was added, modified, deleted, copied, moved etc. Once this model is built in memory, it is used to display the repository’s contents in a tree format to the user. This tree will also include files and folders that were present at a location in a past revision, but have since been deleted. These files will appear grayed-out and allow the user to operate on these deleted files. Most importantly, this in-memory model is used to run Subdivision’s derived selection algorithms that help the user by selecting any additionally required files based on the user selections. This functionality is what allows subdivision to complete the operation in one pass. More details on how the derived selections work can be found in the next sections.
Loading will happen immediately after you create a new project, or open an existing or recent project.
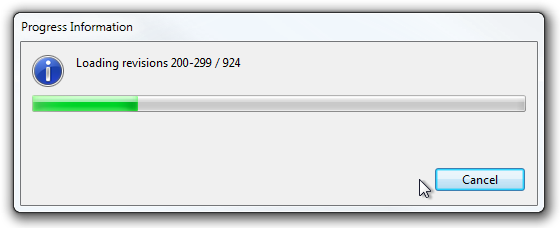
Once the loading completes, the tree with the repository’s files will be displayed. Subdivision is now ready for the file selection step and then the processing of the repository. More details in the next sections.
Processing repositories (or dump files) with Subdivision
Subversion is an outstanding, widely used, source control system. As we know, its principal job is to record every change we make to our repository by committing new files, changes, deletes etc. into a new revision. Unfortunately being designed to “remember” things, means that it’s quite hard to actually make it… “forget” things!
This means that if a file containing sensitive information is accidentally added to a subversion repository, it is quite difficult to permanently delete it (or obliterate it as some people like to call this). Deleting the file using an svn client would hide the file from the HEAD revision. However a user could simply look back in the revision history and recover this sensitive file. This means that if we really want to permanently delete a file we need to do more than simply deleting the file with an svn client.
Before Subdivision, the only tool that could help you in this scenario was a tool called svndumpfilter that is provided with Subversion. The process involved dumping the whole repository into a dump file, using svndumpfilter in order to filter this dump file to remove the sensitive files, and then loading the filtered dump file into a new repository. Even though this process involves quite a bit of command line use, and can take a considerable amount of disk space for large repos, it is still quite manageable when removing a small number of files that were recently committed in a bad commit. However, using svndumpfilter on anything but the simplest of cases can easily become a significant source of frustration as so much time can be wasted filtering and loading over and over again, while the errors don’t seem to stop coming up.
In order to carry out more complex operations such as extracting a project into its own repository you are also almost certainly likely to miss out some of the file copies that are in many cases required. And if you would like to split your repository in two parts while guaranteeing that all files make it to at least one of the output repositories, using svndumpfilter is not a realistic option as it offers no way of knowing whether some files were missed out from being included in one of the output repositories.
So how can Subdivision help? Subdivision is essentially a super-smart svndumpfilter. We say that because like svndumpfilter, Subdivision will also process a dump stream to remove files from it. And Subdivision will also create a new output repository (or dump file) while leaving the original repository intact. But that’s as far as the resemblance goes. The power of Subdivision comes from the fact that it uses the in-memory model of your repository’s file structure to run advanced algorithms that calculate the derived selections necessary for the processing to succeed without errors and in one pass.
So, what is a derived selection? A derived selection is a selection that has to be made in response to one of the user’s selections. So, for example, if a user selects a file for deletion and this file has copies, then these copies will also be selected for deletion as derived selections. This makes sense because if the source file in a copy operation is not there, then you can’t possibly have copies of this file. In another example, let’s say the user wants to extract a file that happens to be a copy of another file. The original addition of this file will also have to be selected for extraction as a derived selection. This is because to extract the copied file, the original addition of that file must be extracted too so that it is present at the time we create the copy of the file. Having Subdivision create these derived selections, means that the user can instantly see exactly what files will be in the output repository and that the operation will complete in one pass without any errors. These are just two simple examples that highlight the basics of what a derived selection is and why it’s so important that Subdivision calculates them for the user. The next chapters will analyze the derived selections in greater detail using examples.
In addition to the above, Subdivision is a graphical application that can carry out the operation without the need for complicated command line tools. It can also work directly on a repository eliminating the time consuming step of creating a dump file that can turn out to be many times larger than your repository in terms of disk usage. And because Subdivision can calculate and only process the required revisions from a repository (or dump file), it means that an operation can finish hundreds of times faster than when using svndumpfilter.
Now that we have established exactly what processing a repository means, we are ready to explore the three different modes of operation offered by Subdivision, namely, deleting files, extracting files and splitting a repository in two parts.
Deleting (or Obliterating) files
Subdivision can be used to permanently delete, or obliterate, files from an svn repository or dump file. To explain how deleting or obliterating files works, we will be using the simplerepo repository. If you have not yet installed this repository, it might be a good idea to see Simplerepo, the simple example repository which details how to download and install this repository so you can follow along with this manual.
Simple file Deletion
Create new delete project
To delete some files from a repository, we need to create a new delete project. Details on how to create a new project can be found in the “Creating a new project” chapter earlier in this manual. For your convenience, here are some images showing how we created the delete project. To create a new project select the “Create New Project” label on the welcome screen or use menu File →New Project which will open the New Project Wizard.


Click the “Browse…” button and find the simplerepo on disk. If you followed our instructions from earlier this should be found in C:\repos\simplerepo.


Select the file to delete
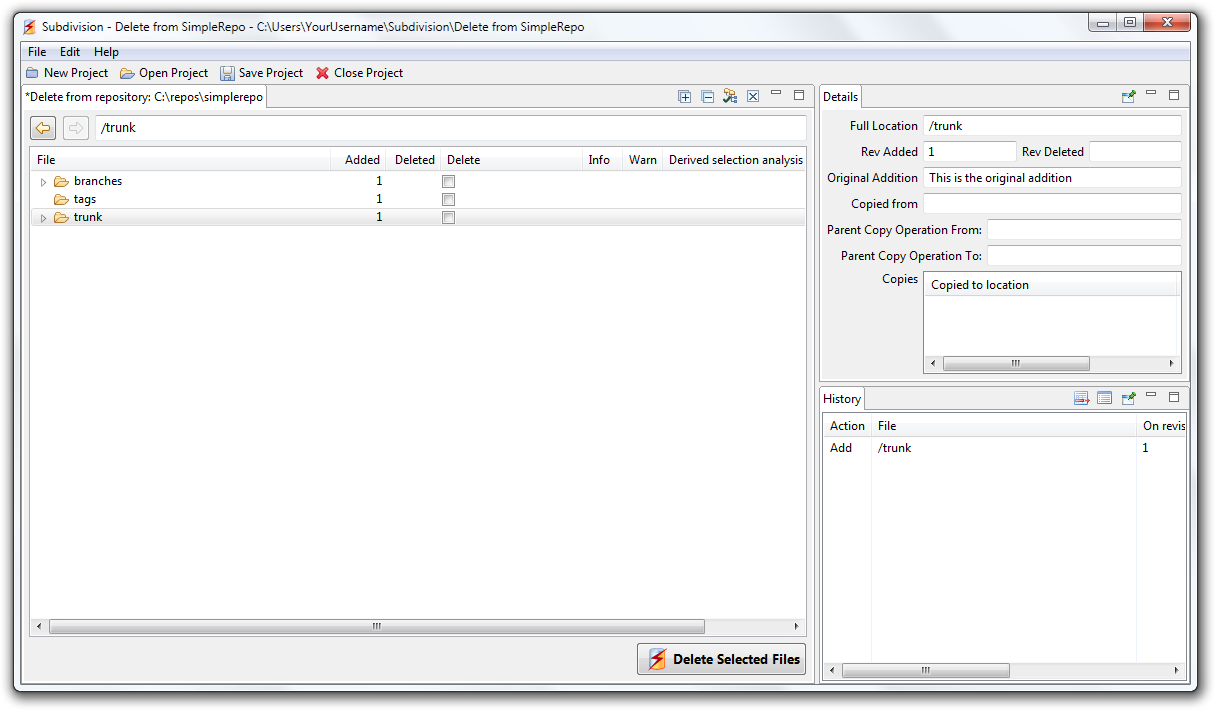
If you followed the instructions correctly, the project should load and you should see the following view in Subdivision:
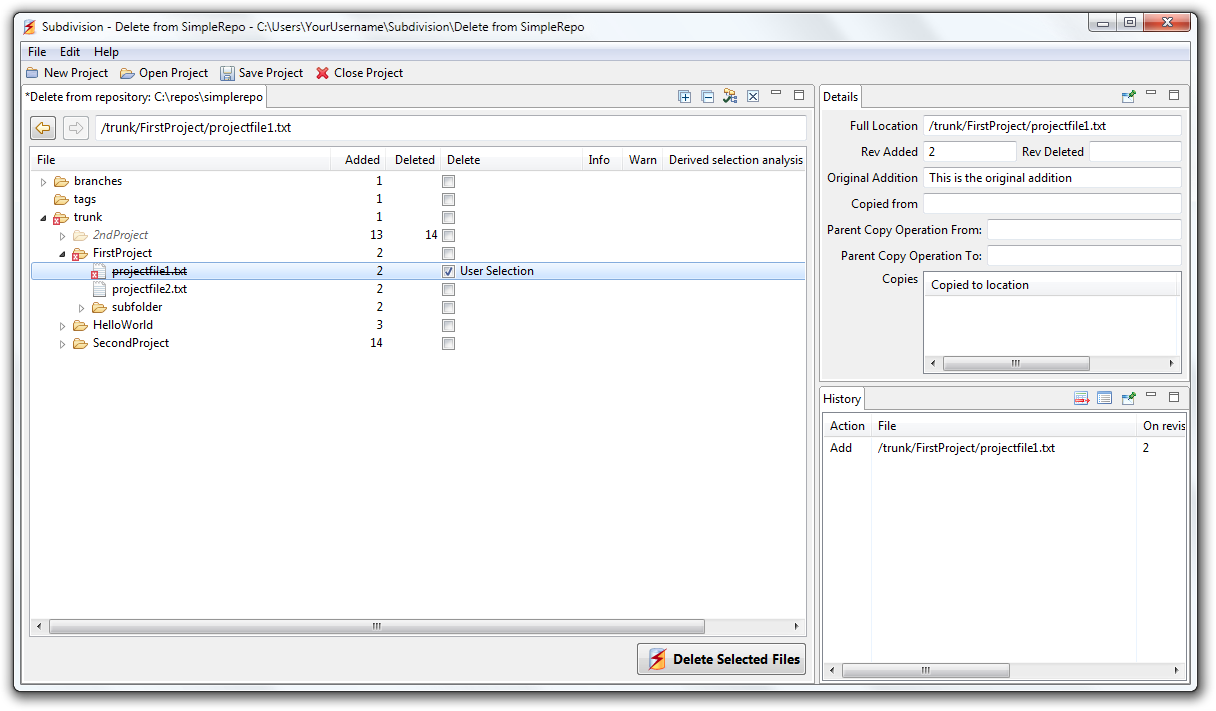
We are now ready to select which files we would like to delete from simplerepo. To delete a file from simplerepo, we need to select it using the checkbox on the same line that can be found under the Delete column. Let’s start with a simple example of deleting file: “/trunk/FirstProject/projectfile1.txt”. All we need to do is select this file. You will see the label “User Selection” next to the checkbox which means that this selection was made by the user. This is to distinguish it from derived selections that will be discussed shortly.
This concludes the file selection stage for this simple example.
Saving the project
When a file selection or deselection is made, or when the output options are changed, an * in the top left of the delete view will appear. This means that the project has unsaved changes. Click the Save Project button or select menu File → Save Project to save your changes to the project.
The delete view icons
An observant reader would notice that some small red “X” symbols have appeared on some folders and the projectfile1.txt. Also the projectfile1.txt is shown with a strike-through. Let’s define what these icons mean.

Red “x” on a folder that has no strike-through on the folder name:
This folder contains a child file or folder that will be deleted. This folder however will not be deleted and will be present in the output repository.
Red “x” on a file or folder with the name shown with a strike-through:
This file or folder will be deleted and will not be present in the output repository.
No red “x” icon or strike-through:
The file or folder will be deleted and present in the output repository.
Tooltips
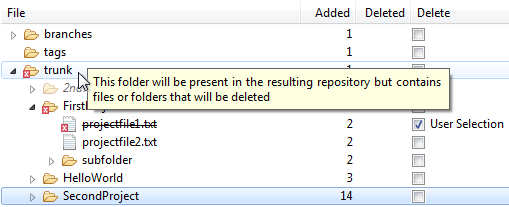
It’s worth noting that Subdivision has extensive Tooltip support. Most areas of the repository tree will provide detailed explanations when the mouse hovers over them.
For example hovering the mouse over the trunk folder will come up with a tooltip explaining what was discussed in the previous section. In this case Subdivision is telling us that this folder will be present in the resulting repository but that it contains files or folders that will be deleted.
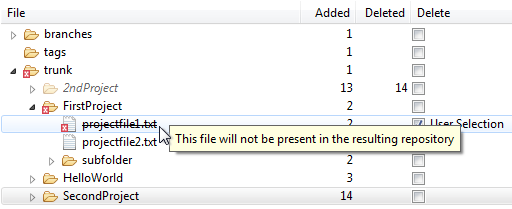
In the next example we see that hovering over projectfile1.txt will show a different tooltip that advises us that this file will not be present in the resulting repository.
Tooltips work on all other columns as well.

Process the repository
To process the repository and create the output repository with the selected file removed; click the “Delete Selected Files” button.
![]()
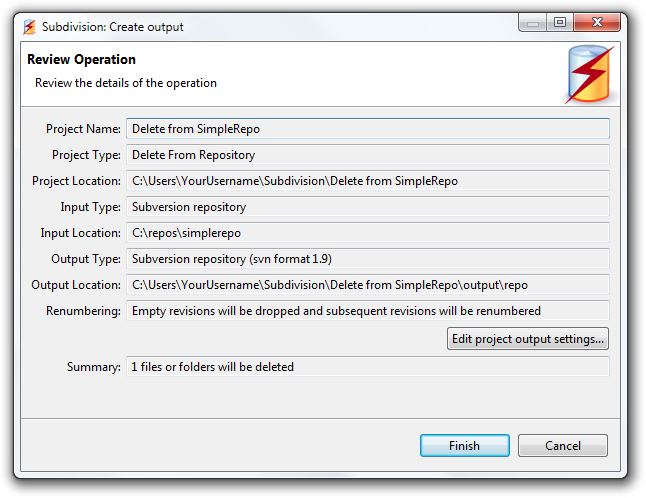
This will bring up the Review Operation dialog with information about what will happen. In this dialog you can see the Project Name, Project Type (Delete, Extract or Split), the Project Location on disk, the Input type (repository or dump file), the input location on disk, the output type (repository or dump file), the output location on disk and the renumbering mode i.e. whether we drop empty revisions. The summary displays how many files will be deleted from the resulting repository.
Click the “Finish” button to begin processing the repository.
Subdivision will begin processing the repository. This is the process where every required revision in the input repository is read into Subdivision, and every file that has not been deleted is written out to the new output repository.

When the processing is successfully completed you will see the following confirmation dialog:

View the output repository
Clicking the OK button will bring up the folder with the output repository on disk.
The user can use a client such as TortoiseSVN (or load the output repository in a new project in Subdivision) to confirm that the file that has been selected for deletion is not present in the output repo or in its history.
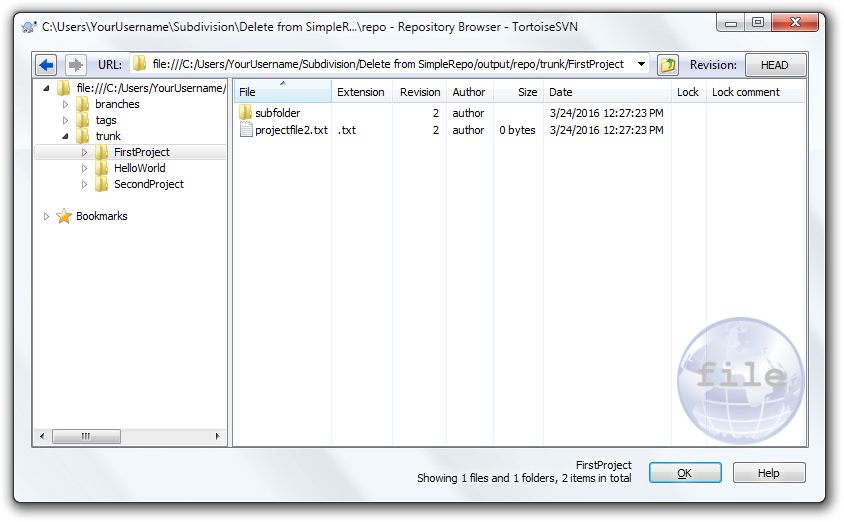
Of course the original input repository is never modified and the user is advised to archive it before replacing it on the server with the new repository created by Subdivision.
Processing the repository again
We may want to process the repository again if we discover that we’ve made a selection mistake. If we fix the selections and try to process the repository again, Subdivision will not let us proceed until the previous output is explicitly deleted.
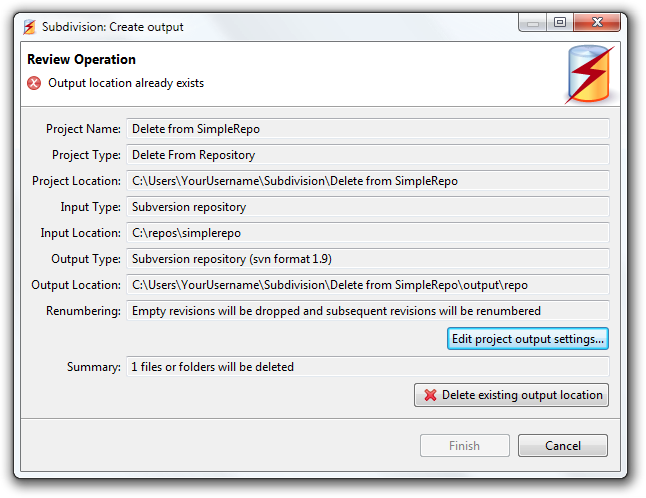
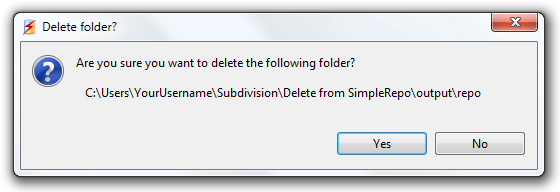
Luckily, Subdivision can help us delete the old output using the “Delete existing output location” button. Clicking this button will ask us to confirm that we want to delete the old output. Clicking ‘Yes’ will delete the old output, after which the processing can continue.
Change output settings
If we prefer a dump file as the output, we can change the output options. To change the output settings we need to open the ‘Edit project output settings’ dialog. This can be opened by either navigating to menu Edit → Edit project output settings… or clicking the ‘Edit project output settings…’ button on the Review Operation dialog. The Review Operation dialog is shown when the “Delete Selected Files” button is pressed. Select ‘Dump file’ under the ‘Output type:’ radio button and click ‘Finish’.

When the repository is processed again by clicking the ‘Delete Selected Files’ button on the bottom right of the Delete view, we see that we get the file ‘filtered.dump’ which is the dump file output from Subdivision. Loading this dump file into a new svn repository will result in a repository that is identical to the repository named ‘repo’ that was output by Subdivision earlier in this chapter.
Deleting a folder
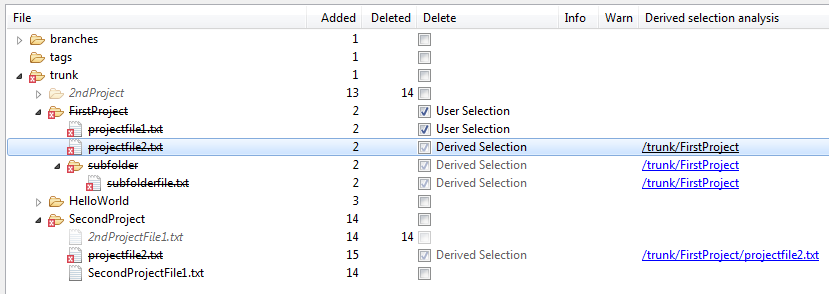
Let’s now select ‘/trunk/FirstProject’ for deletion. We now see a number of derived selections that Subdivision added to our selections to help us. Let’s analyze these derived selections.
First of all, if ‘/trunk/FirstProject’ is to be deleted then all child files under this directory will have to be deleted as well since their parent directory will not be present to house them. This is why we see the derived selection on ‘/trunk/FirstProject/projectfile2.txt’, ‘/trunk/FirstProject/subfolder’ and ‘/trunk/FirstProject/subfolder/subdfolderfile.txt’. The ‘Derived selection analysis’ column is trying to help us by identifying the selection that caused the particular file to be selected. As we can see, next to all of the three derived selections we just mentioned, we see the folder that caused this derived selection. In this case the node causing these three derived selections is “/trunk/FirstProject” since it is the parent to all of these files. Once again the tooltips can explain each derived selection in greater detail. Note that there are different tooltips explaining each derived selection, since there are a number of ways that a file could be selected as a derived selection.

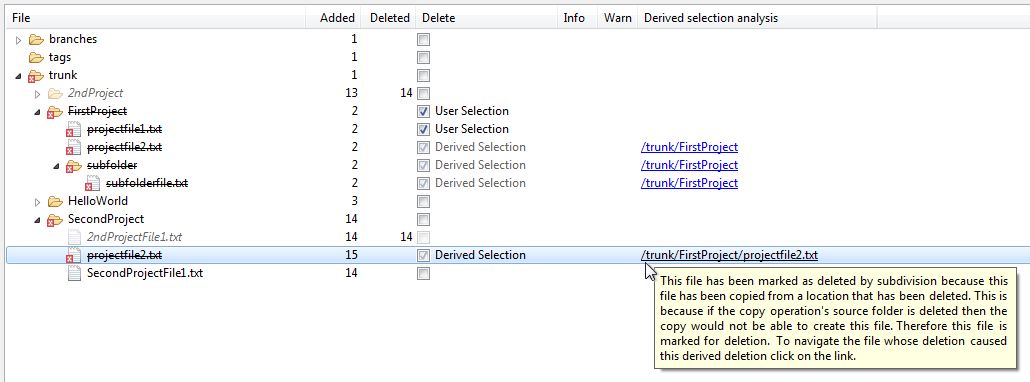
We also notice that ‘/trunk/SecondProject/projectfile2.txt’ has also been selected as a derived selection but why is that? Let’s turn to our trusty tooltips for advice!
Right! Subdivision is telling us that this file has to be deleted since this file has been created by copying it over from a location that has been selected for deletion, namely: ‘/trunk/FirstProject/projectfile2.txt’. The History view can also be very handy here since it displays the history of the selected file.

After every user selection, the algorithms in Subdivision re-calculate the derived selections so that we can have a complete view of what consequences our selections will have on other files.
It’s also worth noting that if we tried using svndumpfilter to exclude ‘/trunk/FirstProject’, we would have seen the following error “svndumpfilter: E200003: Invalid copy source path ‘/trunk/FirstProject/projectfile2.txt’”. This error is thrown because revision 15 tries to copy file ‘/trunk/FirstProject/projectfile2.txt”’ to ‘/trunk/SecondProject/projectfile2.txt’. However since ‘/trunk/FirstProject’ is no longer there, the file is not found to be copied. This means we need to re-run the svndumpfilter to exclude this copy operation as well. But we would not know where the file has to be copied. To find this we need to search in the dump file under revision 15 to identify the copy operation that has to be excluded, i.e. ‘/trunk/SecondProject/projectfile2.txt’. This is relatively easy to do on a repository with 15 revisions. It’s not so easy to do on a repository with thousands of files and revisions. Using Subdivision will most likely save you hours of wasted time and needless frustration as the algorithms work on the in-memory repository structure to calculate all the required derived selections in order for the operation to succeed in one pass.
Deleting copies of files or folders
Let’s remove all of the user selection so that we pick a new set of files to delete. We can either manually remove the user selections or click the “x” button shown below:
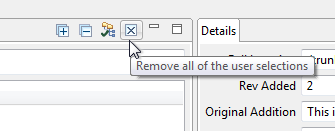
Let’s select ‘/branches/HelloWorld Branch’ for deletion.
As you can see a number of warnings pop up next to this folder. What are these warnings? Let’s have a look at our trusty tooltips.

As you can see, Subdivision is warning us that this folder has ancestors that will remain in the repository. But what is an ancestor? An ancestor is the source of a copy operation. Looking at the History view we see that this folder started its life as ‘/trunk/HelloWorld’ and it was copied from there into ‘/branches/HelloWorld Branch’ on revision 6. This means that ‘/trunk/HelloWorld’ is the ancestor of ‘/branches/HelloWorld Branch’.
Now if we simply wanted to delete the branch, then we don’t need to do anything else. Subdivision warns us that the ancestors will remain in the repository but we simply ignore the warning because all we wanted to do was to delete the branch.
But if we are trying to delete all traces of this project from the repository then we cannot ignore the warning. To delete all traces of this project we need to make sure that the original addition of this folder is selected for deletion. This will in turn create derived selections on all copies deriving from the original addition therefore wiping this project from the repository. Luckily Subdivision can help us identify and select this original addition. The tooltip above mentioned the ‘Remove warning assistant…’. Let’s try that. Right click on ‘/branches/HelloWorld Branch’ and right-click select the ‘Remove warning assistant…’ from the popup menu.
The assistant will calculate the files and folders required to be added to the delete selection in order to completely remove all traces of the project and therefore remove the warning. In this case the remove warning assistant tells us that ‘/trunk/HelloWorld’ needs to be added to the user selection for deletion.
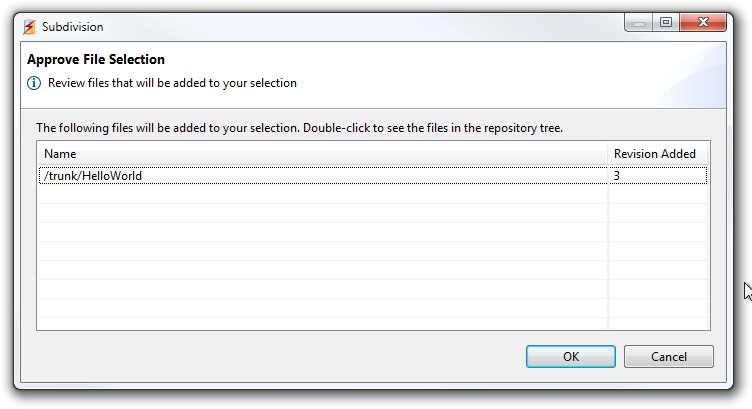
When we click the OK button we see that the warning has gone and that /trunk/HelloWorld has been selected as a User Selection. We also see that the warnings have disappeared which means that all traces of the ‘HelloWorld’ project will be deleted from the repository.
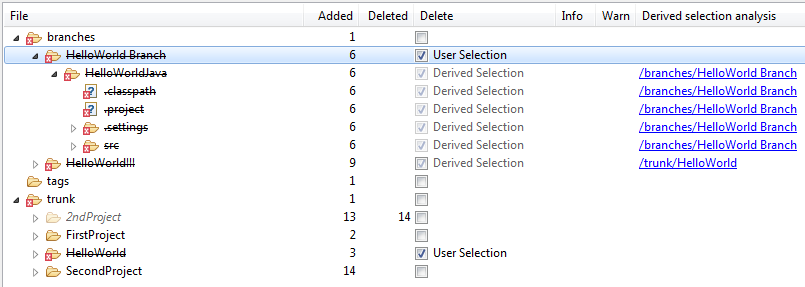
Another important thing to note is that the folder ‘/branches/HelloWorld!!!’ has been selected for deletion as a Derived Selection of ‘/trunk/HelloWorld’. This makes sense because ‘/branches/HelloWorld!!!‘ is a copy of ‘/trunk/HelloWorld’ and since that will be deleted, then all copies will by extension be deleted.
We can see the copies of a file in the Details View. Click on ‘/trunk/HelloWorld’ to see these copies
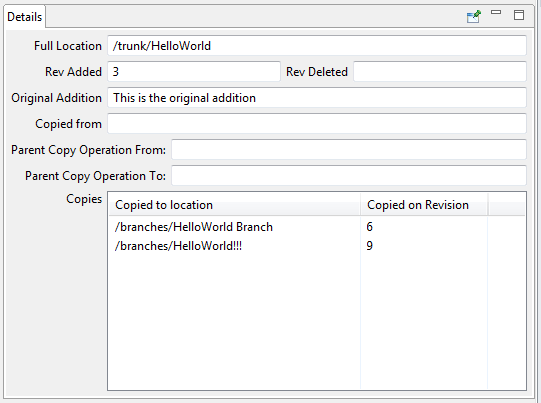
More information about the Details View will be given in the Details View chapter.
Let us now try selecting another folder for deletion to highlight another scenario that can come up. Let’s use our ‘x’ button to remove all of the user’s selections and select ‘/trunk/SecondProject’ for deletion. The yellow warning comes up since ‘/trunk/SecondProject’ is a rename of ‘/trunk/2ndProject’. Renames are done by deleting and copying the folder, therefore these two folders have a copy relationship like in the previous example. To completely remove ‘/trunk/SecondProject’ from our repository we need to run the ‘Remove warning assistant…’ to identify the original addition of this folder. Unsurprisingly, running the assistant on ‘/trunk/SecondProject’ comes back with the suggestion to add ‘/trunk/2ndProject’ to the delete selection. Clicking OK on the assistant selects ‘/trunk/2ndProject‘ for deletion but unfortunately we find out that the warning has not entirely gone.

We see that the yellow warning arrow now has a blue arrow on it. This icon tells the user that a file or folder under this folder has a warning icon. This means that one of the files under this directory has ancestors that will not be completely deleted from the resulting repository. It is now up to the user to decide whether these files have to be completely deleted from the repository. Expanding the ‘/trunk/SecondProject’ folder we see that the file raising the warning is the file called ‘projectfile2.txt’. Checking the history we see that this file was copied over from ‘/trunk/FirstProject/projectfile2.txt’. It’s likely that the user will want to keep this file as it originated in the ‘FirstProject’. If the user however decides that this file has to be deleted completely from the repository, deleting it is as simple as running the “’Remove warning assistant…’ on projectfile2.txt which will identify the original addition of the file and add it to the delete selection and remove the warnings.
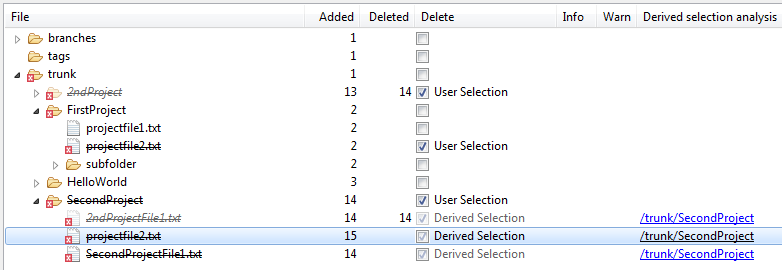
Deletion Prevented Folders
Let’s once again remove all user selections. You can do this manually or by clicking on the “x” button on the top of the delete view.
Now we will select ‘/trunk/2ndProject’. Even through this project has been deleted on revision 14 and would not be visible in the HEAD revision, Subdivision gives us the option to remove it from the history. We also notice that this folder has a copy namely ‘/trunk/SecondProject’. As we mentioned before, this copy was created by the folder being renamed, which in Subversion, translates to a delete operation followed by a copy of the old folder name to the new folder name.
We notice however that both ‘/trunk/2ndProject’ and ‘/trunk/SecondProject’ have a ‘Deletion Prevented’ in the Delete column. We also notice the blue information icon in the ‘Info’ column.
Hovering our mouse over the blue icon, we get a tooltip from Subdivision explaining the situation.

Let’s explain this in a bit more detail and in the context of the example. We notice that ‘/trunk/SecondProject’ contains a file called ‘projectfile2.txt’ that was added on revision 15 i.e. after the ‘SecondProject’ folder was created by the copy on revision 14.
We selected to delete ‘/trunk/2ndProject’ with all of the files under it, and by definition all of their copies. This is because if the source of a copy is deleted we cannot create copies. Since ‘/trunk/SecondProject/projectfile2.txt’ was added to ‘SecondProject’ after its creation, it essentially has no relationship with ‘/trunk/2ndProject’. Therefore Subdivision correctly leaves this file as unselected. Selecting it would mean that a file would be deleted when the user did not explicitly select this file for deletion.
Now since ‘/trunk/SecondProject/projectfile2.txt’ is not selected for deletion, it means that we cannot delete ‘SecondProject’ as it is the folder that houses ‘projectfile2.txt’. Therefore Subdivision marks ‘SecondProject’ as ‘Deletion Prevented’. This means that the ‘SecondProject’ folder would have normally been selected for deletion but because of the new file added to this folder, and because this new file is not going to be deleted, ‘SecondProject’ cannot be deleted. Now since ‘/trunk/SecondProject’ is created from a copy from ‘/trunk/2ndProject’, and because ‘/trunk/SecondProject’ cannot be deleted, it means that by extension, ‘/trunk/2ndProject’ cannot be deleted either. Once again this is because we cannot create ‘/trunk/SecondProject’ if the source of the copy i.e. ‘/trunk/2ndProject’ is not present. So this is how we get to the Deletion Prevented status on ‘/trunk/2ndProject’ and the blue notification icon.
Subdivision can help us to identify the required files to be added to the selection to remove the ‘Deletion Prevented’ status from ‘/trunk/2ndProject’ and allow it to be completely removed. Right click on ‘/trunk/2ndProject’ and select the ‘Delete folder assistant…’
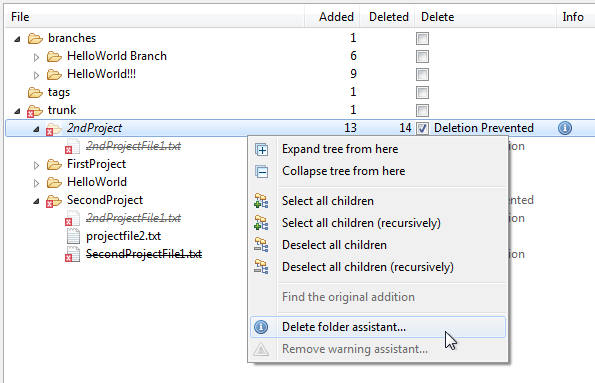
The delete folder assistant… will identify all the files required to be added to the selection so that the folder ‘/trunk/2ndProject’ can be deleted.
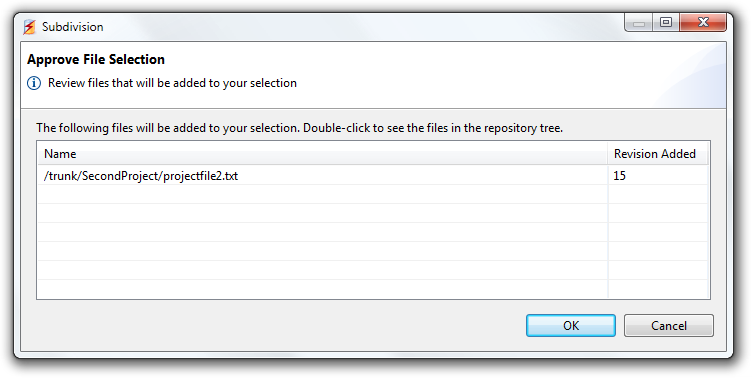
Unsurprisingly, the assistant identified the file ‘/trunk/SecondProject/projectfile2.txt’. Click OK to add this file to the delete selection. The blue info warning on ‘/trunk/2ndProject’ disappears together with the ‘Deletion Prevented’ labels on both ‘/trunk/2ndProject’ and ‘/trunk/SecondProject’.
We notice the yellow warning on ‘/trunk/SecondProject/projectfile2.txt’. We discussed this exact warning earlier in the chapter, but as a quick recap, this is because the file was copied over from ‘/trunk/FirstProject/projectfile2.txt’ which is not selected for deletion. It’s up to the user to decide on whether to remove all instances of this file or not by using the ‘Remove warning assistant…’.
Un-selectable files/folders
You may have noticed that some files and folders have a disabled selection checkbox. As you can see below, ‘/branches/HelloWorldJava’ and all its children are un-selectable. Also ‘/trunk/SecondProject/2ndProjectFile1.txt’ is also un-selectable while the other two files ‘/trunk/SecondProject/projectfile2.txt’ and ‘/trunk/SecondProject/SecondProjectFile1.txt’ are selectable.
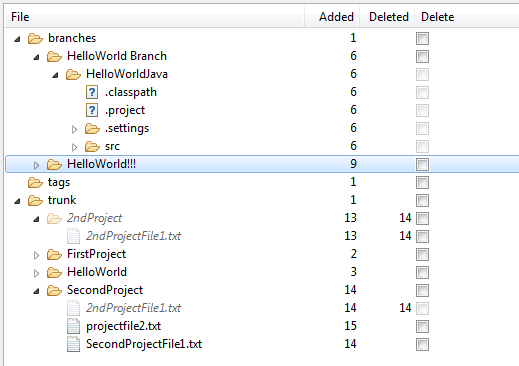
This behavior stems from the way that svn handles folder copies. ‘Hello world branch’ is a copy of ‘/trunk/HelloWorld’ at revision 6 (hence it does not contain ‘HelloWorldC’ that was added on revision 7). When a folder is copied, svn creates a “Cheap copy”. What this essentially means is that Subversion only stores the instruction to copy this folder at a particular revision to another location. All files under this folder are not mentioned in the copy operation since it is implied that they will be included under the copied folder. The implication of this is that the files under a copied folder cannot be individually targeted for deletion. This means that we can generally only select the copied folder for deletion. We use the word generally because an individual file can still be selected for deletion if we select it from the source location that the copy originated from. So for example, to delete ‘/branches/HelloWorld Branch/HelloWorldJava/.classpath’ we have to select the source location that this file was copied from. This location is shown in the Details view in the ‘Copied from’ section.
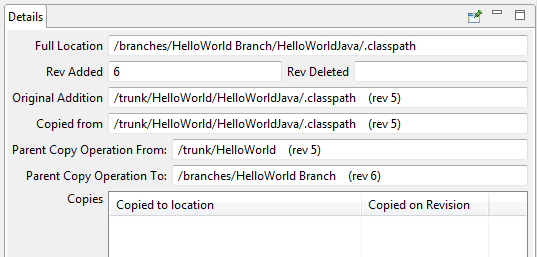
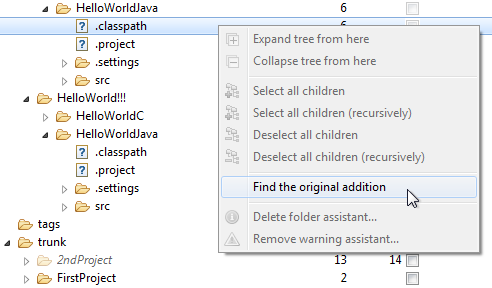
Note that if the source location is also a copy it may also be un-selectable. In that case we need to keep following the copy trail until we identify a file that is selectable. Alternatively we could right-click on the file and select the popup menu ‘Find the original addition’ which will highlight the first addition of this file.
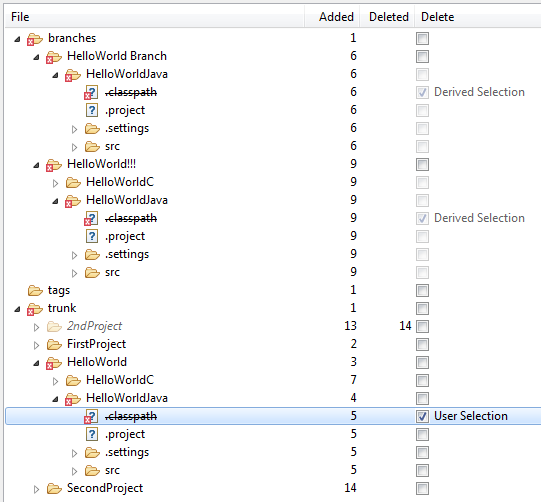
We have to be careful though as selecting the source location (or the original addition) of ‘/trunk/HelloWorld/HelloWorldJava/.classpath’ for deletion will result in all copies of the file to be deleted from the repository. As you can see below, selecting ‘/trunk/HelloWorld/HelloWorldJava/.classpath’ for deletion has caused a derived selection of the ‘.classpath’ file in both of the branches.
Extracting files from a Subversion repository or dump file
Subdivision can be used to extract a subset of a repository from an svn repository or dump file. To explain how the file extraction works we will be using the simplerepo repository. If you have not yet installed this repository, it might be a good idea to see the Simplerepo, the simple example repository section detailing how to download and install this repository so that you can follow along with this manual.
Create new extract project
To extract files from a repository, we need to create a new extract project. Details on how to create a new project can be found in the Creating a new project chapter.
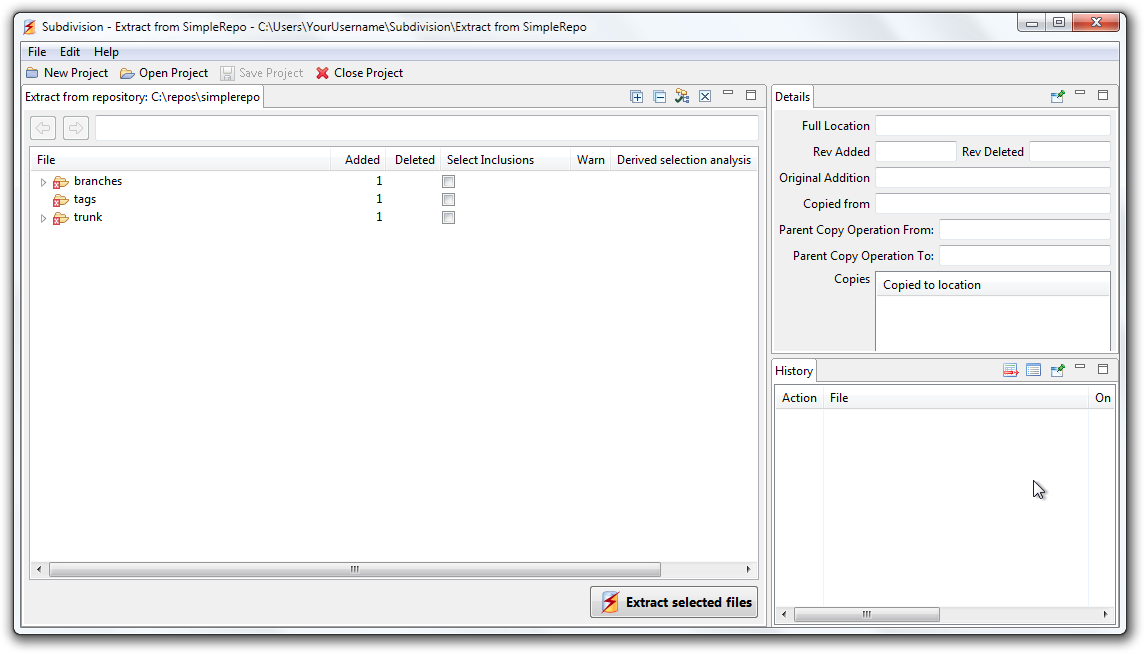
We need to create a new extract project called ‘Extract from SimpleRepo’ that has the ‘simplerepo’ repository as input. For your convenience, here are some images showing how we create the extract project. To create a new project select the ‘Create New Project’ label on the welcome screen or use menu File → New Project which will open the New Project Wizard.
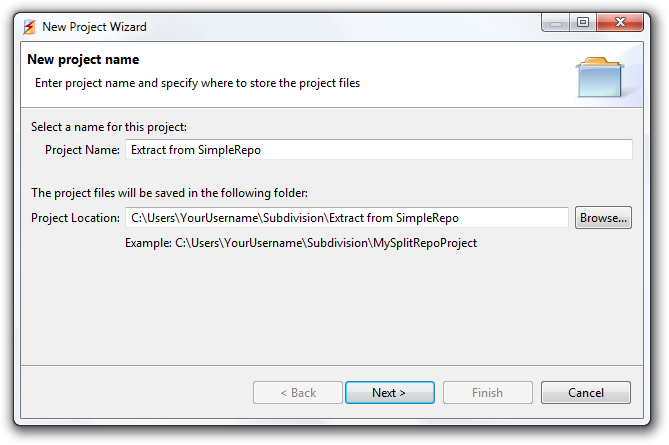

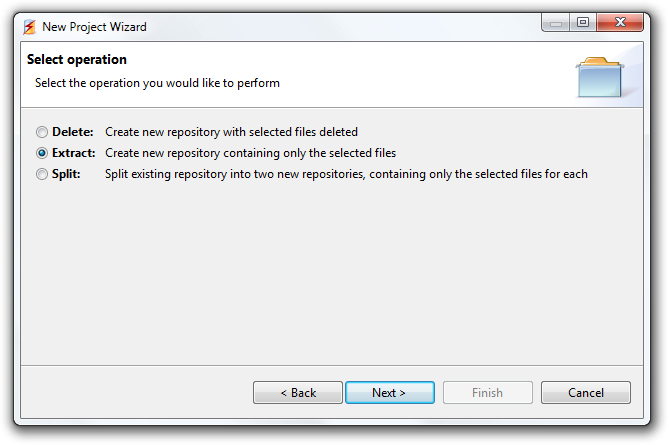
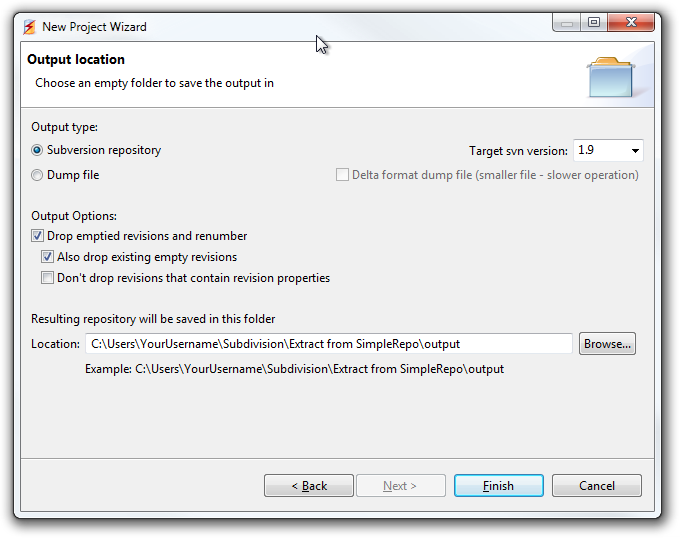
Select the file to extract
If you followed the instructions correctly, the project should load and you should see the following view in Subdivision:
We are now ready to select which files we would like to extract from simplerepo. To extract a file from simplerepo, we need to select it using the checkbox on the same line that can be found under the Extract column. Let’s start with a simple example of extracting file ‘/trunk/FirstProject/projectfile1.txt’. All we need to do is select this file. You will see the label ‘User Selection’ next to the checkbox which means that this selection was made by the user.

You can also see the label ‘Derived Selection’ on ‘/trunk and on /trunk/FirstProject’. These are selections made on your behalf by Subdivision and they represent the additional files and folders required to be extracted in addition to your selection for the operation to be successful. In this simple case we see that Subdivision will also extract the folder ‘FirstProject’ since it is required to hold the file ‘projectfile1.txt’ as well as the folder ‘trunk’ that is required to hold the ‘FirstProject’ folder. It’s worth noting that the derived selection in the extract mode work differently to the delete mode since the logic is essentially reversed and we are selecting files to extract rather than files to delete.
Saving the project
When a file selection or deselection is made, or when the output options are changed, an * in the top left of the extract view will appear. This means that the project has unsaved changes. Click the Save Project button or select menu File à Save Project to save your changes to the project.
The extract view icons
An observant reader would notice that some small files and folders have red “X” symbols and some have a green dot. Let’s define what these icons mean.

Red “x” on a file or folder:
This file or folder will not be present in the output repository.
Green bullet on a file or folder:
This file or folder will be extract and therefore will be present in the output repository.
Red “x” on a folder that also has a green bullet:
This folder will be extracted and present in the output repository. However this folder contains items that will not be extracted.
Tooltips
It’s worth noting that Subdivision has extensive tooltip support. Most areas of the repository tree will provide detailed explanations when the mouse hovers over them. Tooltips were discussed in detail under the Delete section of the manual. Here’s a link to that section in case you skipped it.
Process the repository
To process the repository and create the output repository containing the selected files, click the ‘Extract Selected Files’ button on the bottom right. This will bring up the Review Operation dialog with information about what will happen. In this dialog you can see the Project Name, Project Type (Delete, Extract or Split), the Project Location on disk, the Input Type (repository or dump file), the Input Location on disk, the Output Type (repository or dump file), the Output Location on disk and the Renumbering mode i.e. whether we drop empty revisions. The summary displays how many files will be deleted from the resulting repository.
Click the “Finish” button to begin processing the repository.
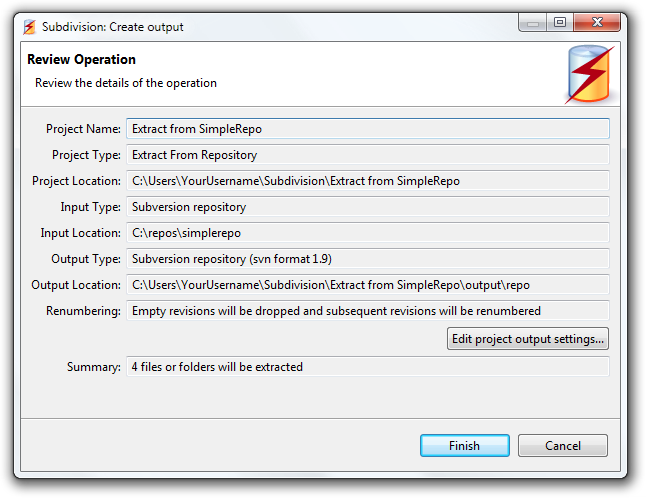
Subdivision will begin processing the repository. This is the process where every required revision in the input repository is read into Subdivision, and every file that has not been deleted is written out to the new output repository.

When the processing is successfully completed you will see the following confirmation dialog:

View the output repository
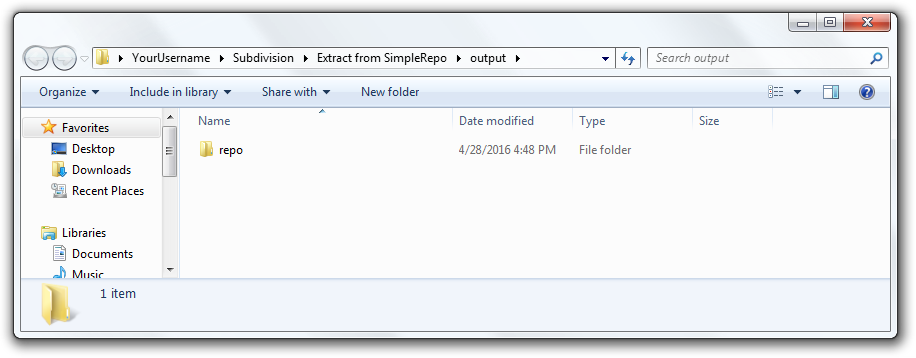
Clicking the OK button will bring up the folder with the output repository on disk.
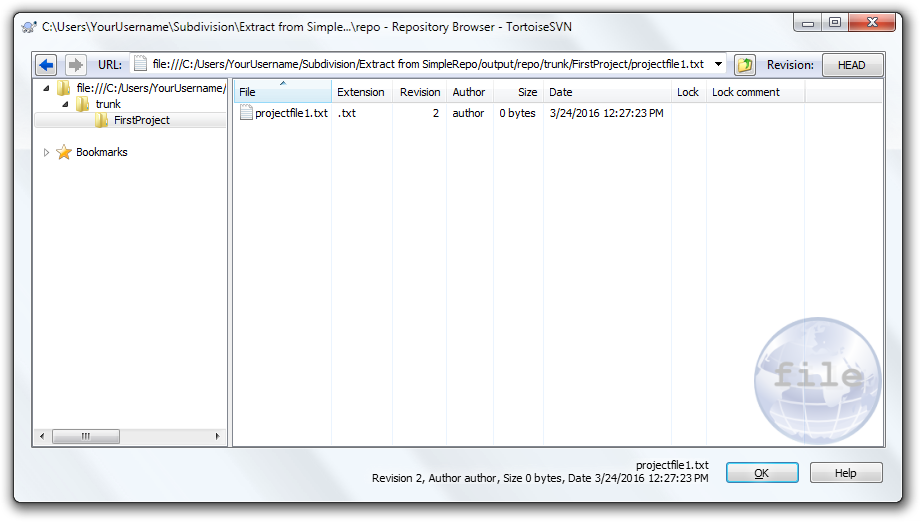
The user can use a client such as TortoiseSVN (or load the output repository in a new project in Subdivision) to confirm that the selected files have been extracted and are present in the output repo.
Of course the original input repository is never modified and the user is advised to archive it before replacing it on the server with the new repository created by Subdivision.
Change output settings
You may change some of the output settings such as the output type (repository or dump file), the output location etc. Here’s a link to the section that discusses the output settings in case you are not reading this manual from ‘cover to cover’.
Extracting a folder
When you select a folder for extraction, all files under that folder will be selected too as derived selections.
If you would like to select all items under a folder with the exception of a few, you can right-click on a folder and chose ‘Select all children’. Subdivision will select all items under the folder, and you are then free to un-select the items you do not want to extract.
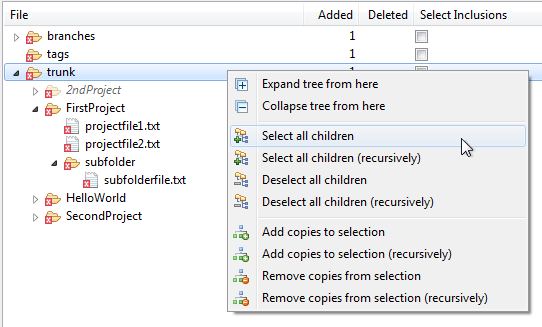
Extracting a file/folder that has copies (Extract warnings)
Let us now remove all selections and select ‘/trunk/HelloWorld/HelloWorldJava’. We see a yellow warning appear next to it. Let’s use our trusty tooltips to get an explanation of the reason this warning icon came up. Hovering the mouse cursor over the warning we see the following:
Subdivision is telling us that this folder has copies that have not been selected for extraction. If we just want this folder and its children extracted we don’t need to do anything and we can ignore this warning.
If however our intention is to extract this copy together with all of its copies (that would typically be in branches, tags etc) then we can have Subdivision help us by adding the required children to our selections. When all copies of this folder are selected, the warning will go away. To resolve this warning, right-click on the ‘HelloWorldJava’ line and select ‘Remove warning assistant…’ from the popup menu.
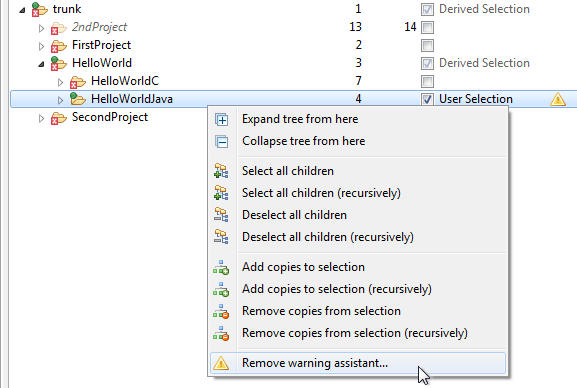
Subdivision will calculate the required files that need to be added to the selection and display them in the following dialog:
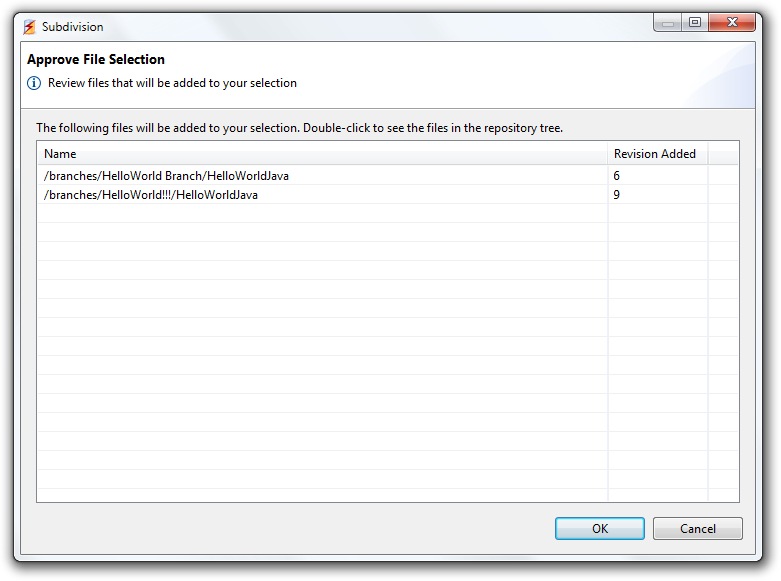
We see that Subdivision has identified the unselected copies. Clicking ‘OK’ will add these files to the user’s selections.
Extracting a folder that has a child with a warning
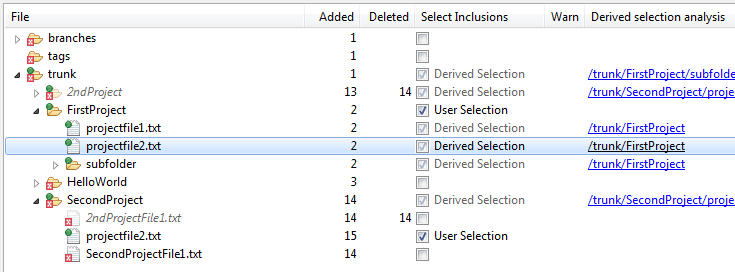
Let’s once again remove all selections. Now let’s select folder ‘/trunk/FirstProject’. We see that we get a yellow warning icon that has a blue arrow pointing downwards. This means that one of the children of ‘/trunk/FirstProject’ has a warning, but that ‘trunk/FirstProject’ does not have a warning itself. Let’s expand the folder to see which of its children raised a warning.

We see that file ‘/trunk/FirstProject/projectfile2.txt’ has a warning. This is because the particular file has a copy in ‘/trunk/SecondProject/projectfile2.txt’. We can see the copies of this file in the Copies table of the Details view.
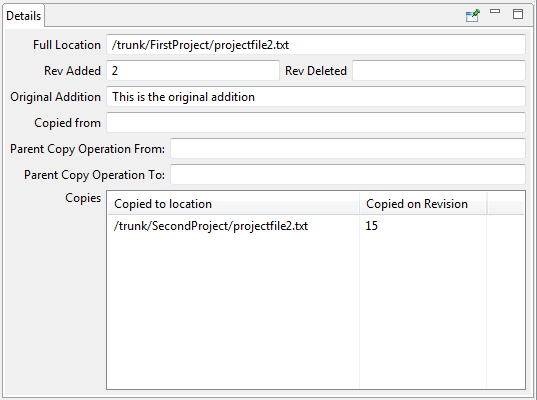
The remove warning assistant can once again be used to remove this warning. Right-click on ‘FirstProject’ and run the ‘Remove warning assistant…’. The assistant will identify the file ‘/trunk/SecondProject/projectfile2.txt’ and once we click OK it will be added to the user’s selections and the warnings will disappear.
Split a repository
Subdivision can be used to split a subversion repository making sure that no files in the input repository are missed out from one of the two output repositories.
The split operation is essentially an extraction operation done twice. To avoid duplicating the extract chapter, we will only be explaining the differences between split operation and the extract operation. If you have not read the Extracting files from a Subversion repository or dump file chapter we urge you to do that now as it examines fundamental concepts such as how the extraction works, what are derived selections, how the warnings work etc. You may then continue with this chapter which will highlight the extra functionality provided in the split mode.D
To explain how a repository split works, we will be using the simplerepo repository. If you have not yet installed this repository, it might be a good idea to see Simplerepo, the simple example repository which details how to download and install this repository so that you can follow along with this manual.
Create new split project
To split a repository, we need to create a new split project. Details on how to create a new project can be found in the Creating a new project chapter.
We need to create a new split project called ‘Split SimpleRepo’ that has the simplerepo repository as input. For your convenience, below are some images showing how we create the extract project. To create a new project select the ‘Create New Project’ label on the welcome screen or use menu File → New Project which will open the New Project Wizard.
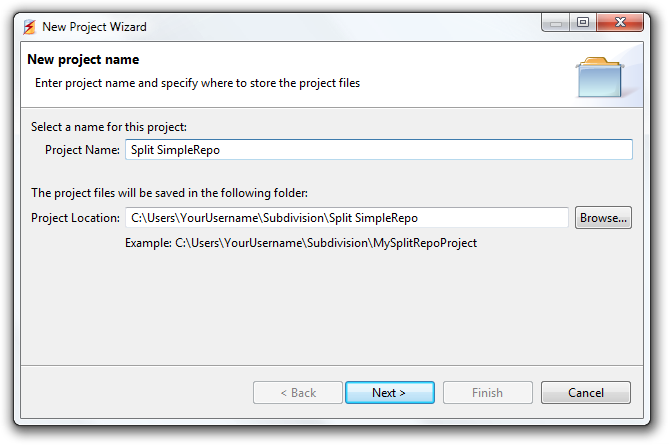
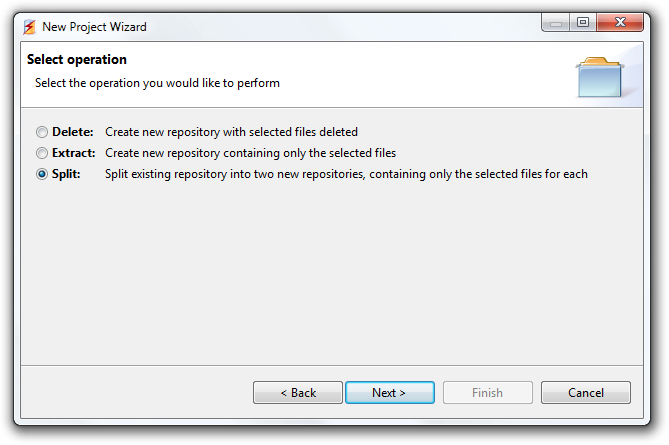
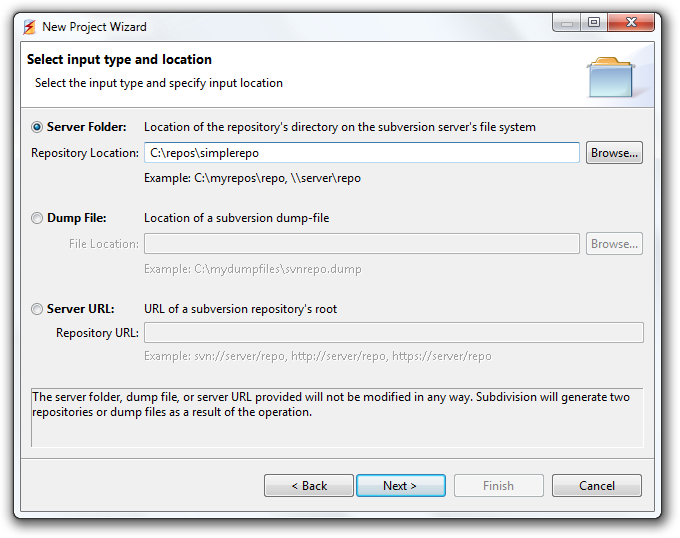
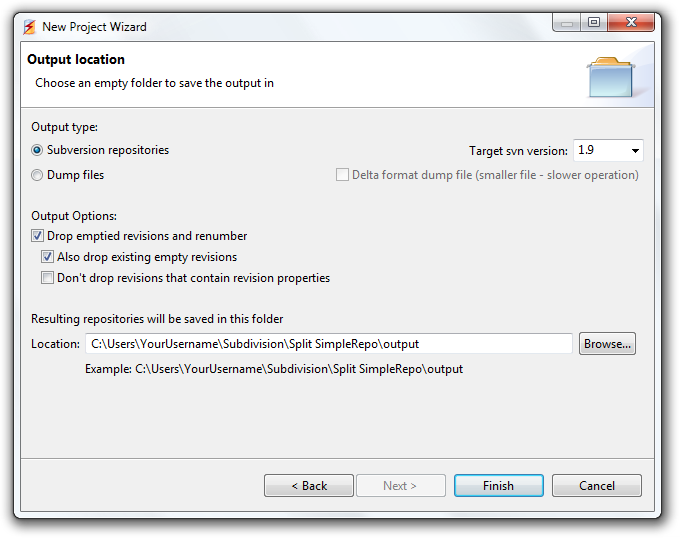
Select the file to have in each part
If you followed the instructions correctly, the project should load and you should see the following view in Subdivision:
As we mentioned before, the Split operation is essentially an extract operation done twice. In this chapter we will be explaining the differences between the Split operation and the Extract operation. If you have not done so, we advise that you familiarize yourself with the Extracting files from a Subversion repository or dump file chapter that examines fundamental concepts such as the derived selections in the context of extracting files from a repository.
We will now focus on explaining the extra functionality available in the split mode.
In the split mode we see that we have two columns with selection checkboxes. Files selected in column ‘Select Repo 1’ will go to the first output repository and of course files selected using the checkbox in column ‘Select Repo 2’ will go to the second output repository.
A simple selection example
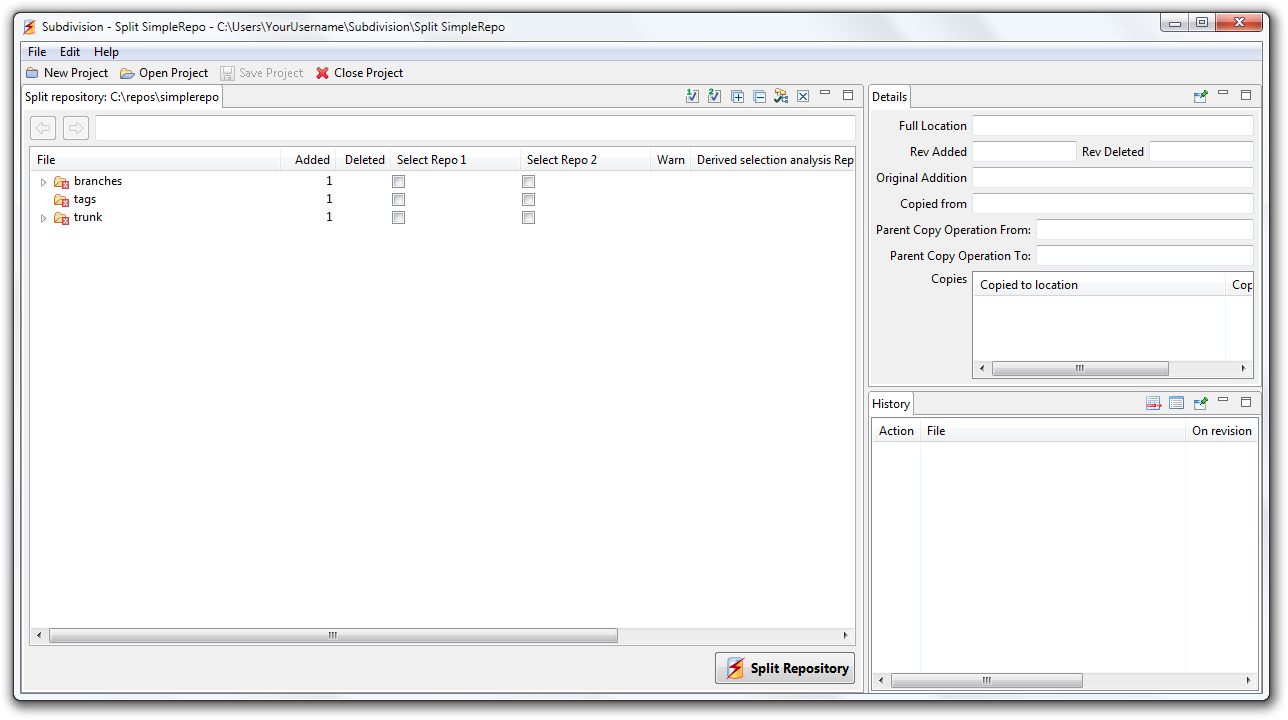
As we can see above, we selected ‘/trunk/SecondProject’ to be extracted into output repository 1 and the ‘/tags’ folder to be extracted into output repository 2. Subdivision displays the target repository of each file using a small green number overlaid on the top left and bottom left of the file’s icon. So the small green number 1 on ‘/trunk/SecondProject’ tells us that this folder will be extracted into output repository 1. And the small green number 2 on /tags tells us that tags will be extracted into output repository 2.
You can also see some derived selections under repository 1. These derived selections are created from the selection of ‘/trunk/SecondProject’ under output repository 1. We hope it’s clear that since each output repository is its own independent extract operation, the derived selections are made in the same repository as the selection.
We see that some files have a red “x” on them. We see that /branches and its children display the red “x” icon which means that these files will not be extracted in either of the two output repositories. Another interesting case is ‘/trunk’ having the red “x” but also being selected for extraction in output repository 1. The red “x” in this case denotes the even though ‘/trunk’ will be present in output repository 1, it contains children that will not be extracted in either of the two output repositories.
Selecting a file in both repositories
If we look closely at the above example, we see that ‘/tags’ and ‘/trunk’ display are annotated with both 1 and 2. This means that these folders will be present in both of the output repositories. In addition, ‘/trunk’ displays a red “x” which means that it contains files that will not be extracted in either output repository.
Having a file or folder selected for both output repositories can sound counter-intuitive. After all we are trying to split a repository in two parts, so you may expect that each file has to appear on only one of the two output repositories. Having files appear on both output repositories is completely normal. In the example of ‘/trunk’ above we see that this folder is a derived selection on both output repositories. This is because ‘/trunk’ is required to house some selected files in output repository 1 and some other files in output repository 2. Therefore it has to be present in both repositories.
Another scenario that may cause a file to be present in both repositories is when a file has copies and one of the copies is selected to be extracted in output repository 1 but the other copy is selected to be extracted in output repository 2. An example follows below:
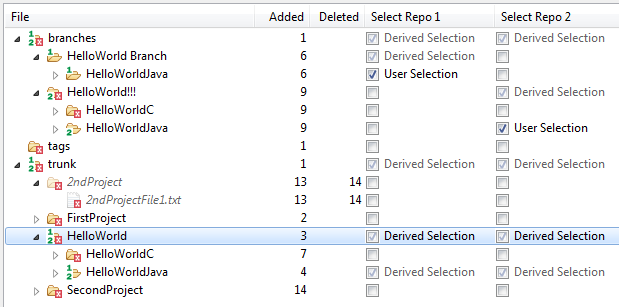
As we can see, the folder ‘/trunk/HelloWorld/HelloWorldJava’ will be appearing in both repositories since it is the copy source to the two branches ‘/branches/HelloWorld Branch/HelloWorldJava’ and ‘/branches/HelloWorld!!!/HelloWorldJava’. Since the first branch is selected for output repository 1 and the second branch is selected for output repository 2, it implies that ‘/trunk/HelloWorld/HelloWorldJava’ must be present in both repositories since it is the source of the copy operation that creates the branch copies.
The split view icons
Here are the definitions of all icons that may appear in the Split view:

Red “x” on a file or folder:
This file or folder will not be present in either of the output repositories. If your intention is to have a split where every file in the input appears in one of the two output repositories, make sure that no file or folder has this red “x” showing.
Green number 1 on a file or folder:
This file or folder (with all children) will be extracted into output repository 1 only.
Green number 1 with red x on folder:
This folder will be extracted into output repository 1 only but some of the folder’s children will not be present in either of the output repositories. If your intention is to have a split where every file in the input appears in one of the two output repositories, make sure that no file or folder has this red “x” showing.
Green number 2 on a file or folder:
This file or folder plus all children will be extracted into output repository 2 only.
Green number 2 with red x on folder:
This folder will be extracted into output repository 2 only but some of the folder’s children will not be present in either of the output repositories. If your intention is to have a split where every file in the input appears in one of the two output repositories, make sure that no file or folder has this red “x” showing.
Green number 1 and green number 2 on a file or folder:
This file or folder plus all children will be extracted into both output repositories.
Green number 1 and green number 2 with red x on folder:
This folder will be extracted into output repository 1 and output repository 2 but some of the folder’s children will not be present in either of the output repositories. If your intention is to have a split where every file in the input appears in one of the two output repositories, make sure that no file or folder has this red “x” showing.
Including all files
We mentioned before that the Split mode is essentially the combination of two extract operations. The user may be wondering why we need the Split mode if we could simply create two extract projects, select the appropriate files in each one and “split” the repository this way. The answer is that we could easily forget to select a file for extraction in one of the output repositories. Therefore a file which is present in the input repository may end up being accidentally missed out from both output repositories.
The power of the Split mode comes from the fact that it can give us confirmation that all files have been selected for inclusion in at least one of the two output repositories. Therefore we can guarantee that every file in the input repository will appear in at least one of the two output repositories.
In all the split examples in this chapter we saw some files having the red “x” overlay on some files and folders. This means that these files or folders will not be extracted in either output repository. To make sure that all files in the input repository make it to at least one of the output repositories, we need to make sure that no red “x” appears on any file or folder in the repository.
As an example let’s say we want to split all Java projects into their own repository. We select all Java projects in the Select Repo 2 column and everything else in Select Repo 1 column. The selections would look as shown below. Notice that there are not red “x” overlays and that all files and folders have a green number. This guarantees that all files in the input repository will make it to at least one of the output repositories.
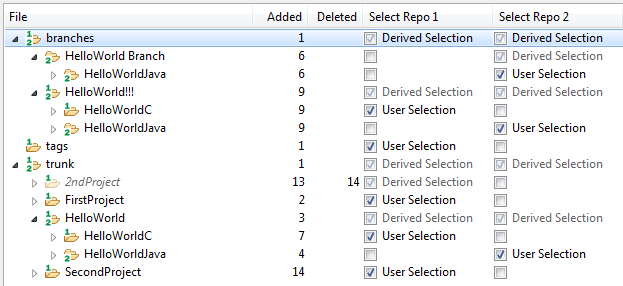
It is worth noting that when the red “x” overlay is visible on some files or folders, i.e. when some files or folders were not selected for inclusion in one of the two output repositories, Subdivision will still process the repository without warning to create the output repositories. This is because some users may want to get rid of some files as part of the split. It is up to the user to make sure no red “x” overlays appear on any file or folder in the repository if all files are required.
Split mode warnings
Similar to the extract mode, the split mode has a warning column. In the split mode however the warnings are shared between the two output repositories. The tooltips of the warning icon will be very useful to the user as they will let the user know which output repository selections caused the warning.
For example the tooltip on the warning when the folder is selected in repository 2 looks like this:
However when the same folder is selected in both repositories, the warning comes from both selections. Hence the tooltip changes to the following:
This is telling the user that to remove this warning, the user would have to right-click and select ‘Remove warning assistant… (Selecting into repo 1)’ and then also right-click and select ‘Remove warning assistant… (Selecting into repo 2)’ as well.
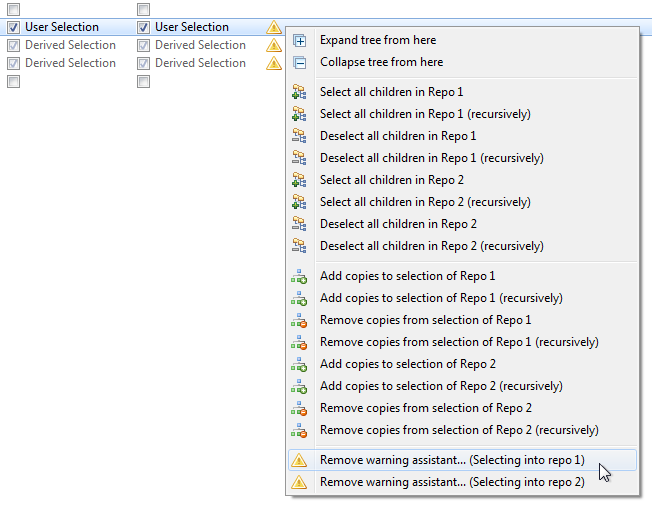
The remove warning assistants will identify and select the required copies. More information on the warnings and their removal can be found in the section Extracting a file/folder that has copies (Extract warnings).
The select all buttons
The split mode has two extra buttons on the top. These buttons are the checkboxes with a small green number in them.

Selecting the checkbox shown above will select all files and folders at the root of the repository into output repository 1. This is useful when the root of the file structure contains many files and folders and the user would like to place most of them in output repository 1 and only a couple in output repository 2. The user can therefore select all items using the button targeting repository 1 and then deselect the few items that have to go to repository 2. The user would subsequently select these files and folders for inclusion into output repository 2.
The Details view
The details view appears on the top right in Subdivision. Its purpose is to show some extra information about the current file selection in the tree that can be very useful to the user. Clicking on the pin button ![]() will lock the details view onto the current file and further file selections in the tree will not update the Details view.
will lock the details view onto the current file and further file selections in the tree will not update the Details view.
Example 1:
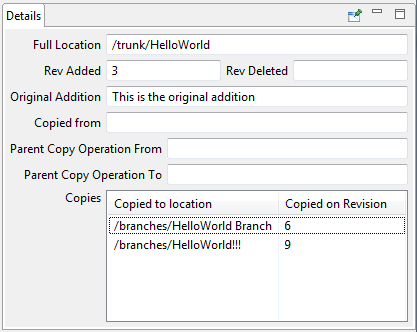
Example 2:
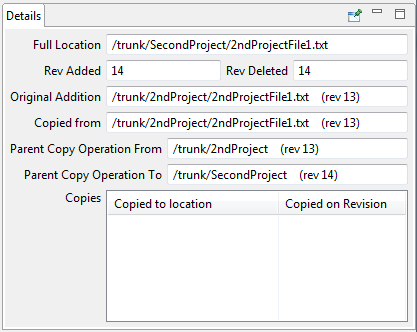
Here’s an explanation of what each field means:
- Full Location
The full path of the selected file. - Rev Added
The revision that this file was created. - Rev Deleted
The revision that this file was deleted. If this field is not populated it means that the file has not been deleted therefore is still visible in the HEAD revision. In example 1 we see that ‘/trunk/HelloWorld’ has not been deleted and in example 2 we see that ‘/trunk/SecondProject/2ndProjectFile1.txt’ was deleted on revision 14. - Original Addition
Shows the path of the original addition of the selected file. The bracket following the path denotes the revision this path was added on as we can have the same path added in multiple revisions (see the concept of peg revisions in the svn manuals). When we create a copy of a file, an ancestry relationship is created between the newly created copy and the source of the copy. A copy could then be subsequently copied again or moved (a move is essentially a delete operation followed by a copy operation). It’s often useful to identify the original addition i.e. the earliest ancestor of a file. This is exactly what this field provides. If the selected file has no ancestors and therefore is the original addition of the file, this field will contain “This is the original addition”. If the selected file is a descendant of another file i.e. it was copied from somewhere else, then this field will show the path of the first ancestor. In example 1 we see that this field contains “This is the original addition” because the selected folder ‘/trunk/HelloWorld’ is the original addition of this folder. In example 2 we see that selected file’s original addition is file ‘/trunk/2ndProject/2ndProjectFile1.txt’ that was added on revision 13. - Copied from
If populated, shows the path this file was copied from. This field will be empty if this file is the original addition. - Parent Copy Operation From
When a folder is copied, all children files under the folder will be copied too. When one of these children is selected, the ‘Parent Copy Operation From’ field displays the path where the parent folder was copied from in the copy operation that created the selected file. - Parent Copy Operation To
When a folder is copied, all children files under the folder will be copied too. When one of these children is selected, the ‘Parent Copy Operation From’ field displays the path where the parent folder was copied to in the copy operation that created the selected file. - Copies
Displays the list of all copies of the selected file or folder. The ‘Copied to Location’ column displays the path where this file was copied to and the ‘Copied on Revision’ column displays the revision that the copy was made on.
The History view
The History view appears on the bottom right in Subdivision. Its purpose is to show the history of a file from its addition, until its deletion. It responds to the some extra information about the current file selection in the tree that can be very useful to the user. Clicking on the pin button will lock the History view onto the current file and further file selections in the tree will not update the History.
The History view looks like this after we select the ‘/branches/HelloWorld!!!/HelloWorldC/src/HelloWorldC.c’ file in the tree on the left.

We can see when the file was added, when it was copied and from where to where as well as when the file was modified. Clicking on the ![]() icon will hide the modification lines.
icon will hide the modification lines.

If we now select ‘/trunk/SecondProject/2ndProjectFile1.txt’ we can see the addition, the move (also known as a file rename), from where to where and when the file was deleted.

Pressing on the ![]() button will show the history in the way svn stores the operations. A move (or rename) is represented by a delete and add operation in svn and after pressing the button we can see the operations in this format. ‘A’ stands for Add, ‘D’ for Delete and ‘M’ for modification.
button will show the history in the way svn stores the operations. A move (or rename) is represented by a delete and add operation in svn and after pressing the button we can see the operations in this format. ‘A’ stands for Add, ‘D’ for Delete and ‘M’ for modification.
Search for files to add to selection
As of Subdivision 1.5, you may also add files to your selection by searching for them. To open the search dialog you may do one of the following:
- Click the
 icon on the project toolbar. Subdivision will be search for files in the whole of the repository
- Click on the ”
 Select files by searching within this folder…” menu item after right-clicking on a folder. Subdivision will then search for files under that folder. In our example below any search queries will be run under trunk.
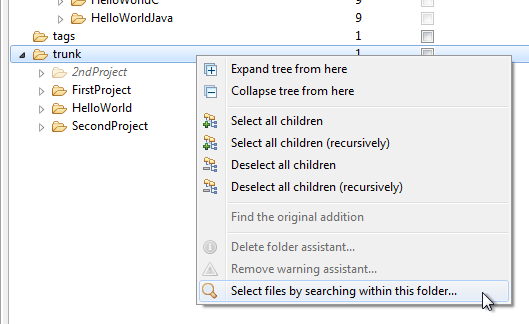
The search dialog looks like this
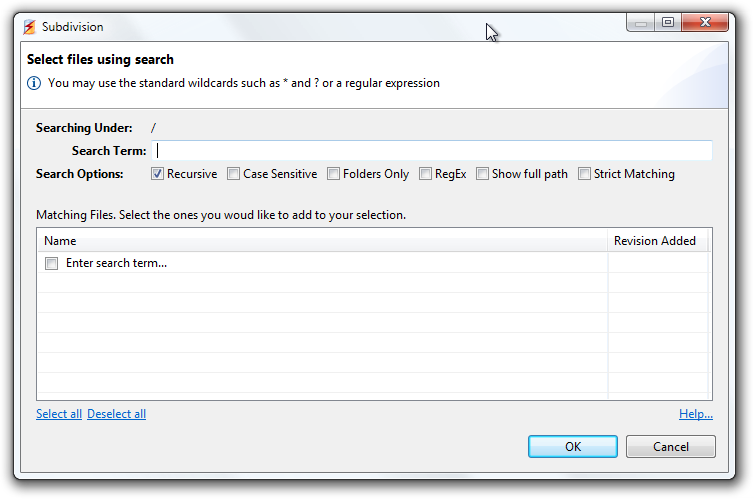
Once you start typing in the Search Term: field, the results will appear in the table below. Standard glob wildcards are acceptable such as * and ?.
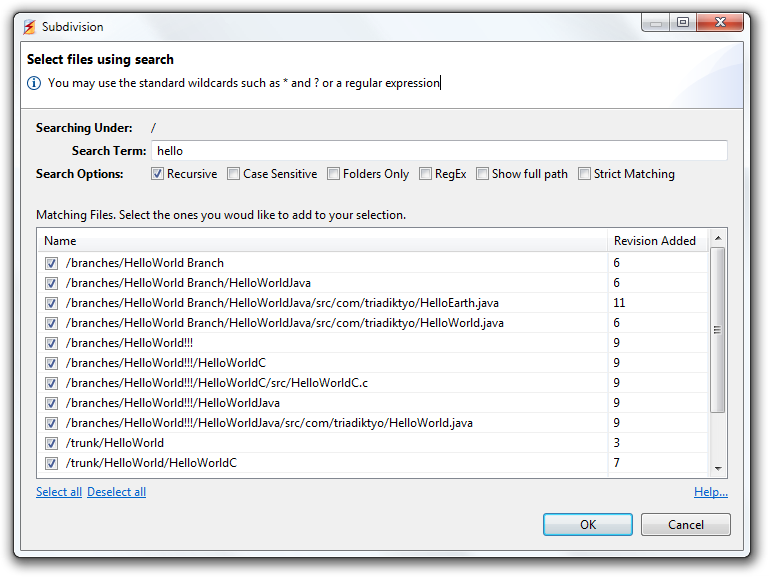
When you click OK, all files that are selected in the table will be added to the selection. You may of course deselect any found files that you may not want added to the selection. The ‘Select all’ and ‘Deselect all’ labels under the table can help you select or deselect all files to make it easier for you to achieve the right selections.
“Searching Under:” displays the location the search will start from. In the example above we can see the path ‘/’ which is the root location of the repository. If we started the selection using the right-click popup on trunk then ‘/trunk’ would be displayed there.
Let’s also examine the Search Options.
- Recursive:
When selected, the search will look inside child folders thereby examining the whole hierarchy under the ‘Searching Under’ location. When not selected, the search will only match items in the ‘Searching Under’ location only. - Case Sensitive:
Pretty self-explanatory. When selected, the search will take into consideration the case of the search term. - Folders Only:
When selected, only folders will be matched - RegEx:
Search using Regular Expressions. This is a much more powerful method of searching but of course a bit trickier. An explanation of the regular expression syntax is of course beyond the scope of this manual but lots of resources are available online. An important thing to note when using Regular Expressions is that you may need to add leading and trailing ‘.*’ characters to get a match. So to get the same results using regular expressions as the example above, we would have to search for the term ‘.*hello.*’. - Show full path:
This is applicable when searching under a folder. When unselected, the results will appear with a leading ellipsis such as ‘…/result.txt’ where the ellipsis denotes the ‘Searching Under’ folder. In other words we will see only the paths under a search folder which makes results a bit shorter. To view the full paths, select this option. - Strict Matching:
When this is selected, you may have to enter a leading and/or trailing ‘*’ around your search term. This setting is useful when you would like to find files ending in a search term in which case the search term would be ‘*searchterm’
Conclusion
This concludes the Subdivision Manual. For any questions on any of the above topics please contact Subdivision Support at support@subdi.vision and we would be more than happy to assist you with them.

